Below is a list of items that are required or recommended:
- 27+ AWG wire. 30AWG Kynar style recommended
- Hot Glue (recommended)
- Torx T7 screwdriver
- Spudger or other thin object
- Temperature adjustable soldering iron – Set temperature no higher than 350c/660f (recommended)
- Lead-free solder
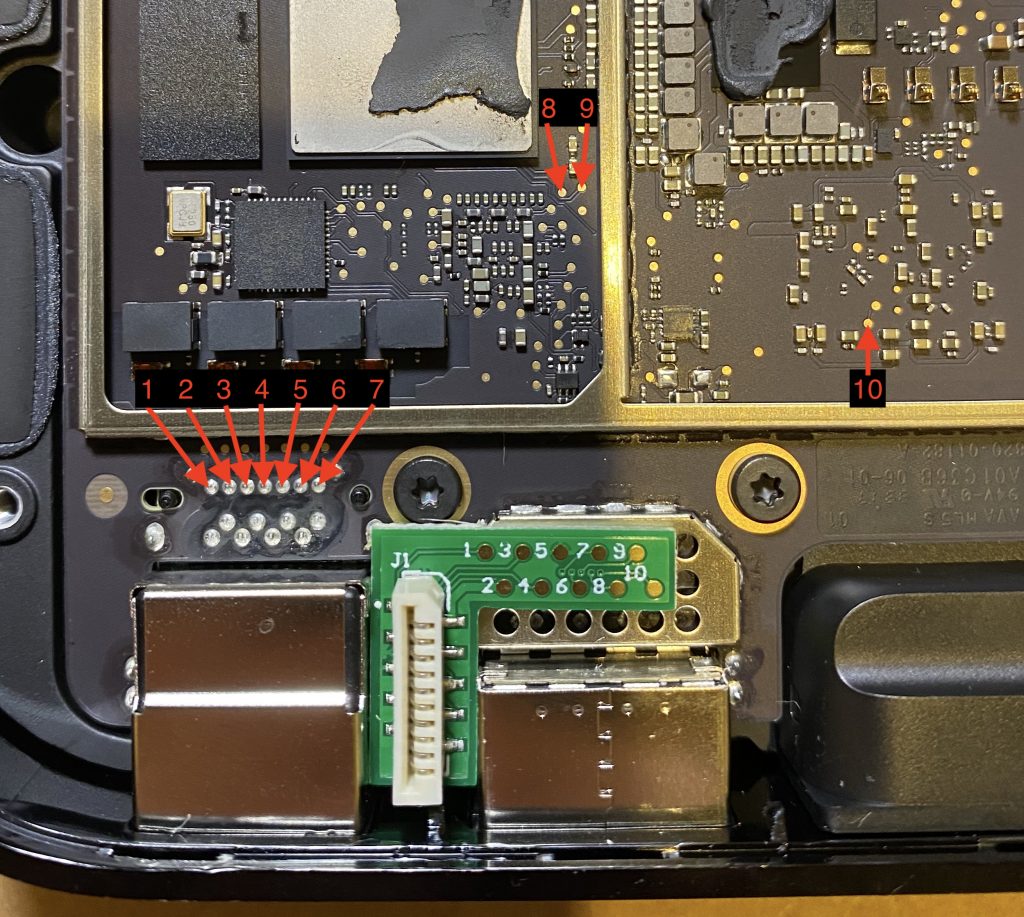
Above is a map of where each of the numbered pads on the breakout connect to the Apple TV 4K, below is a deeper look at the install process.
Use a thin object like a guitar pick or spudger to work around the base, releasing the clips that hold it in place.
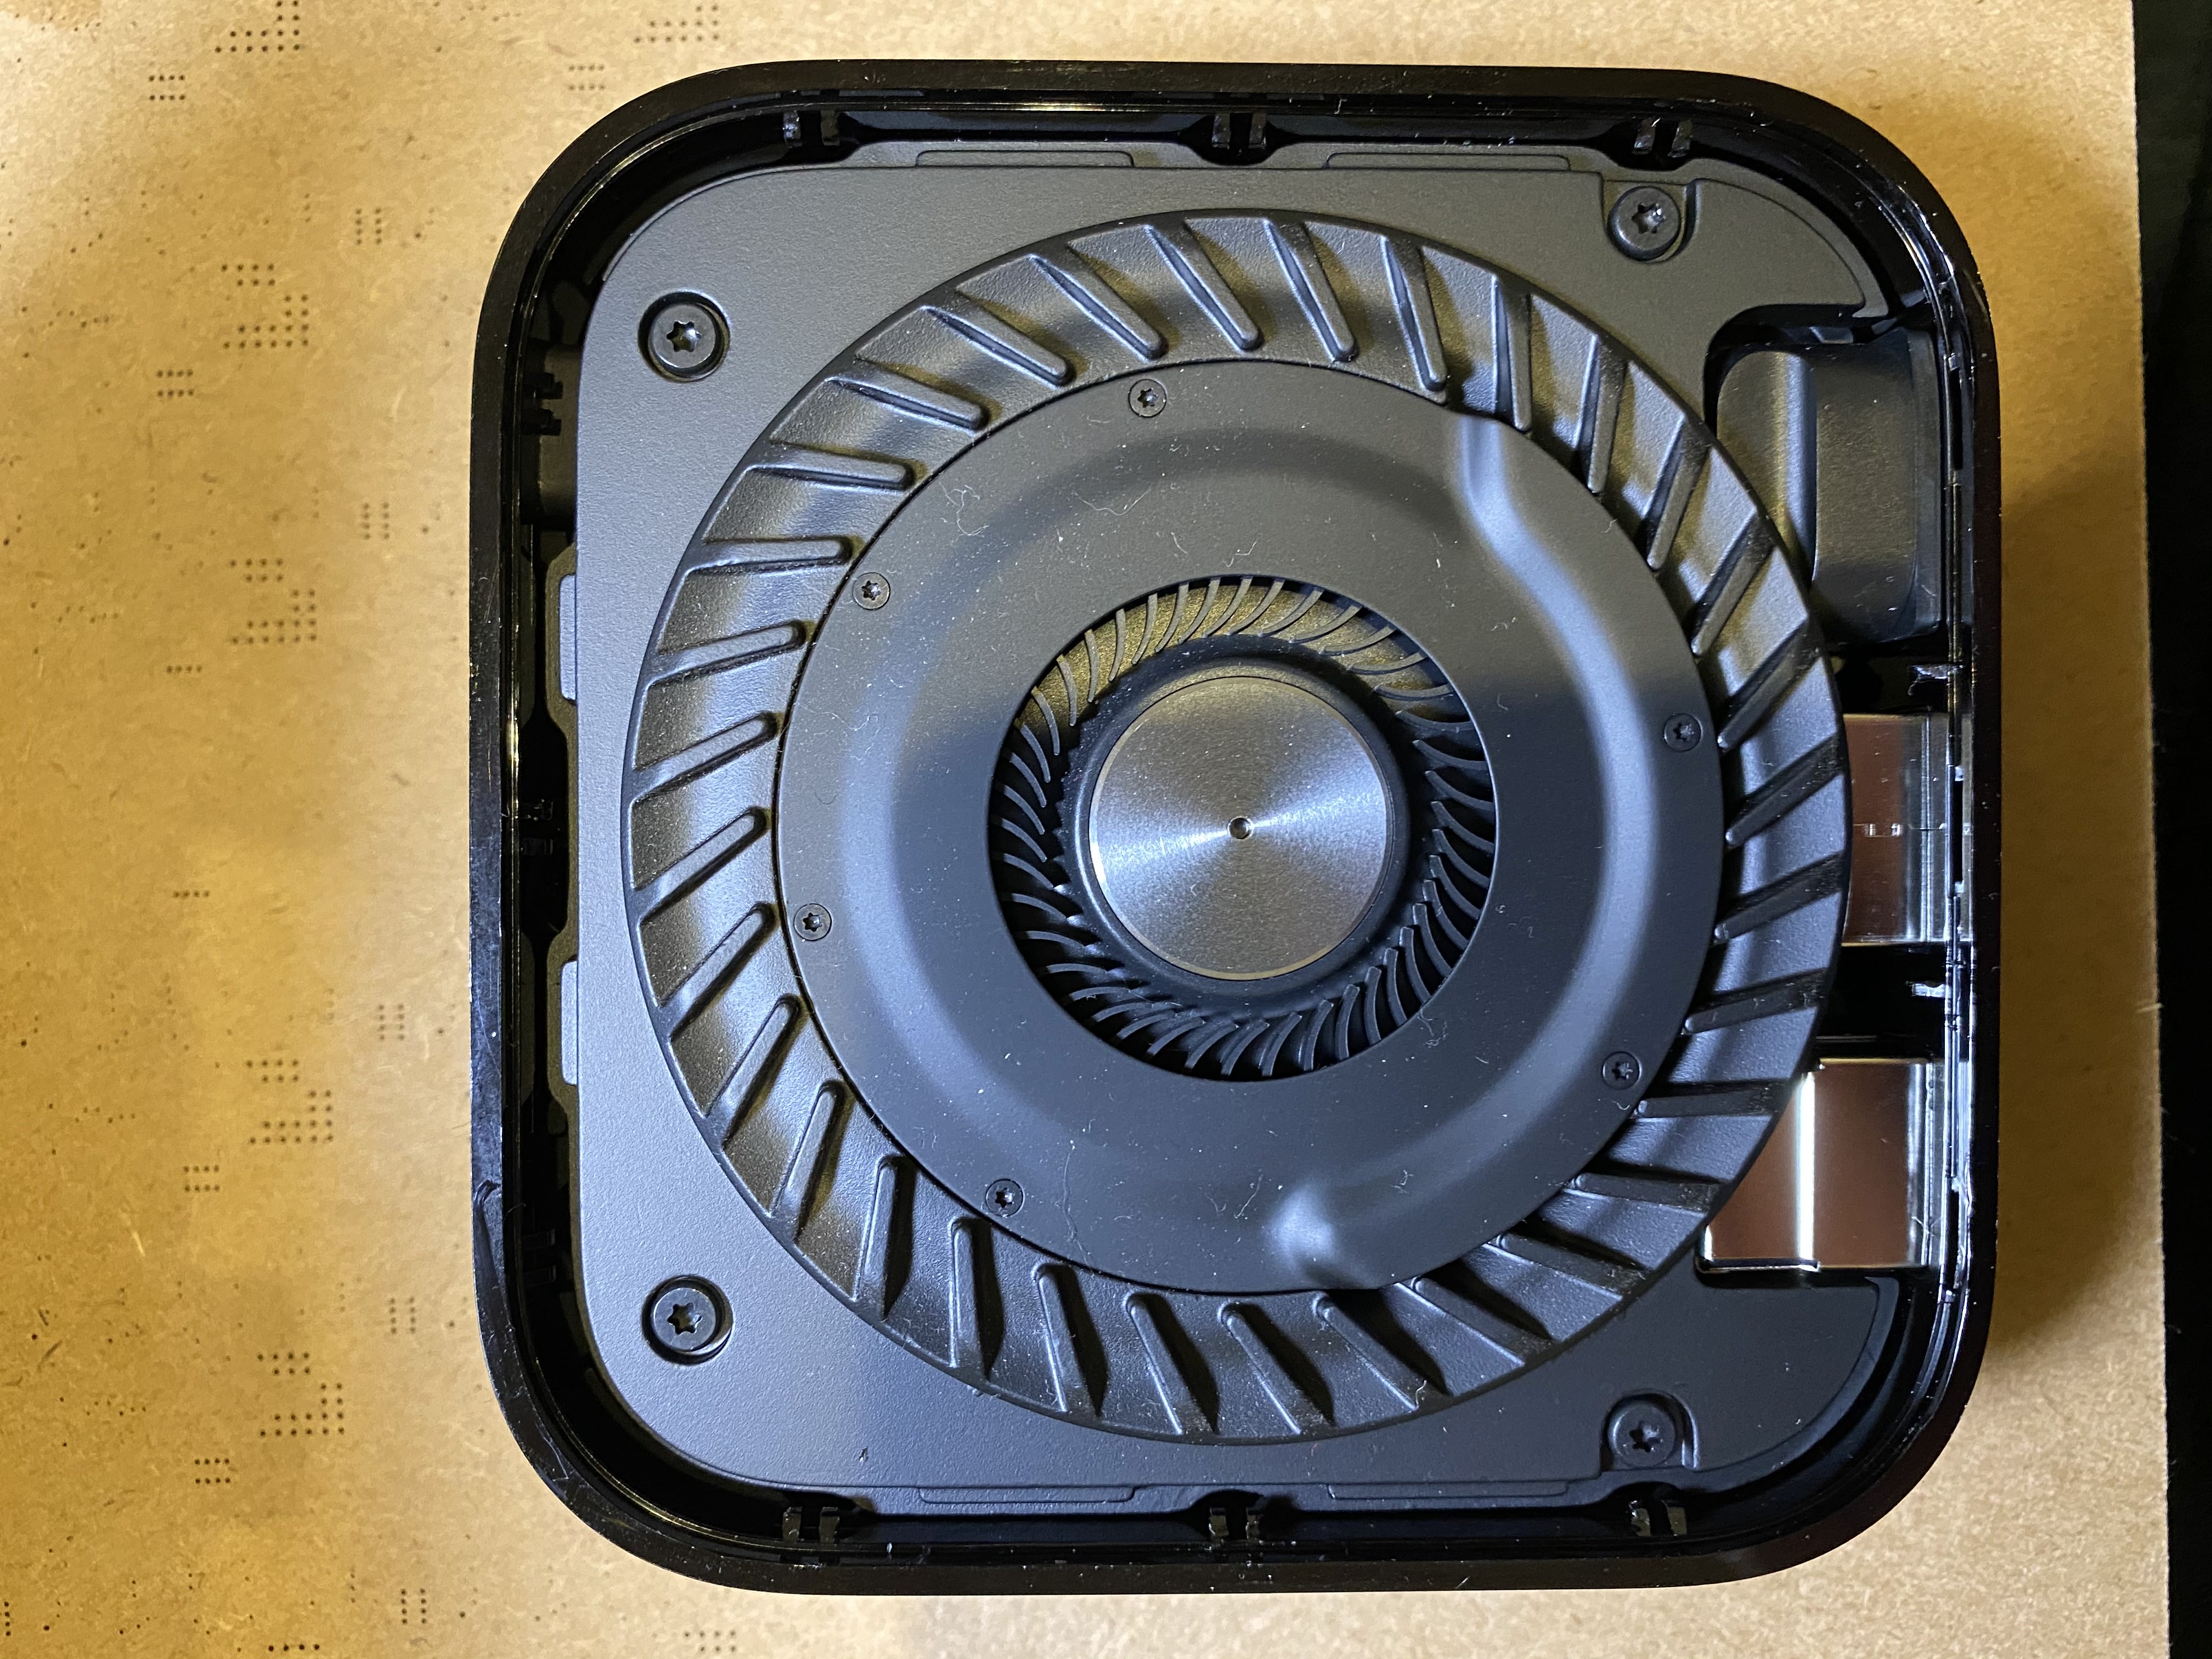
Remove the 4 screws that hold the fan assembly in with a T7 screwdriver
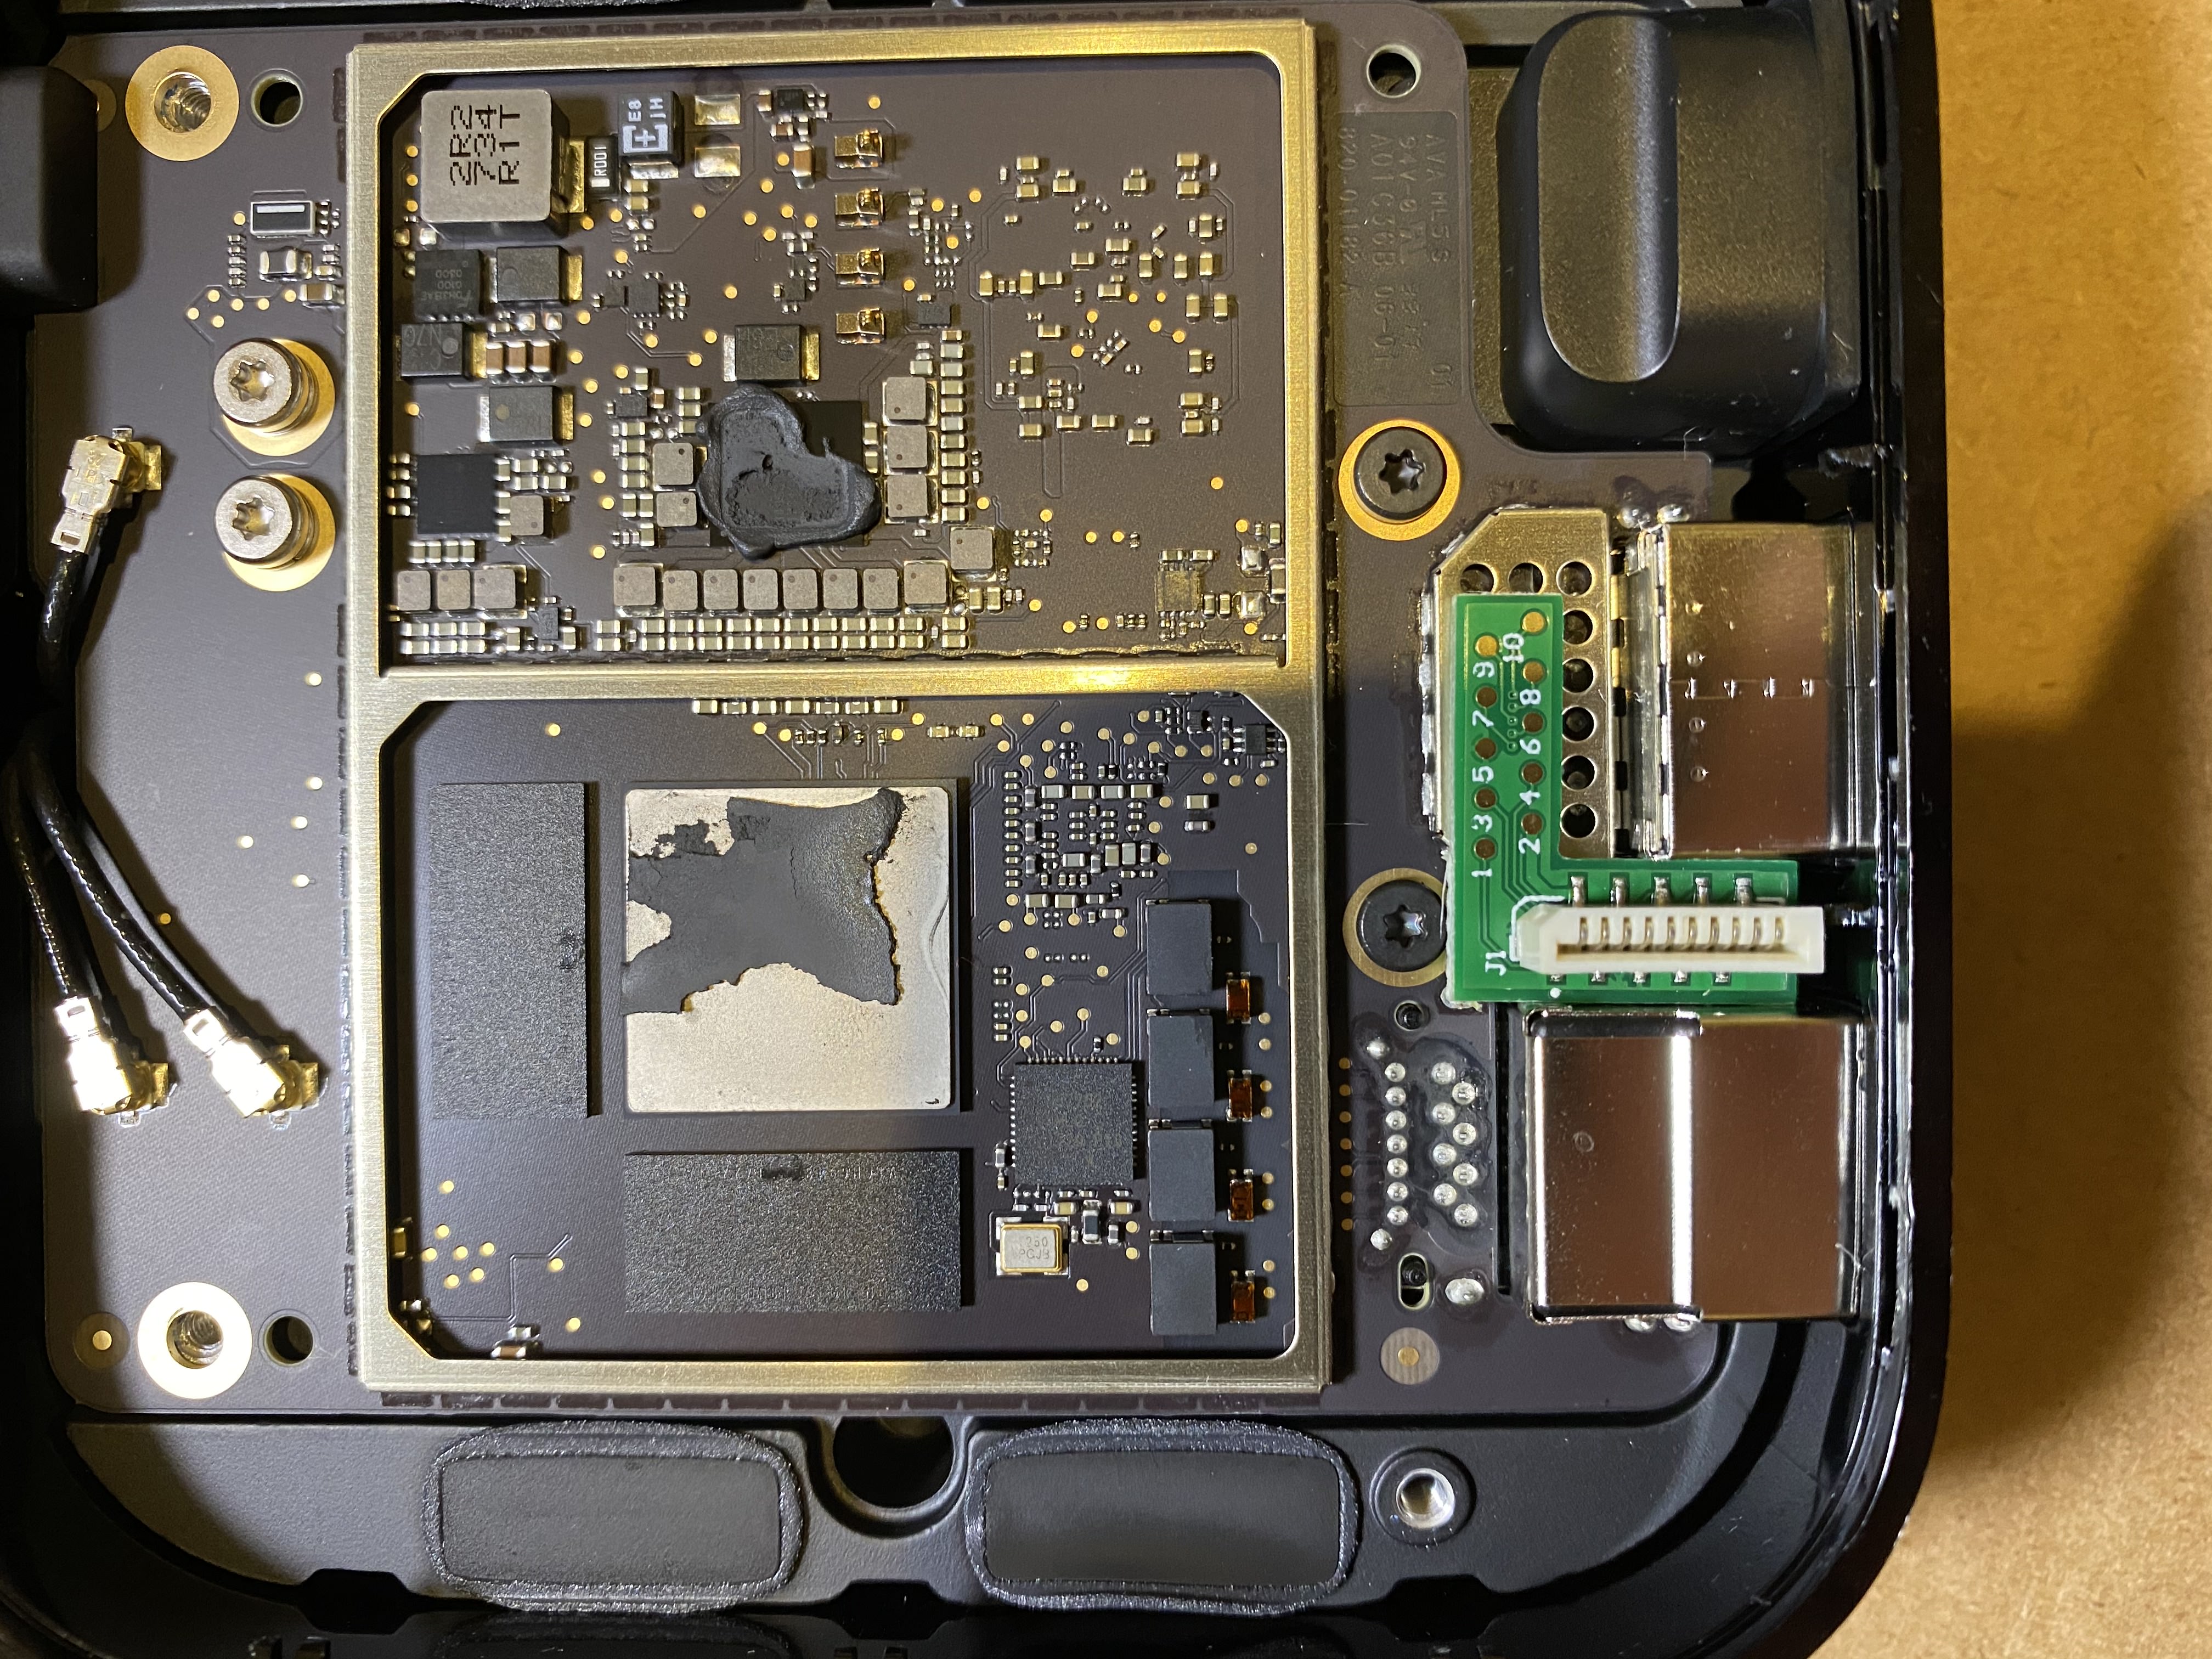
With the Apple TV stripped to this point, we are ready to start Installing the breakout
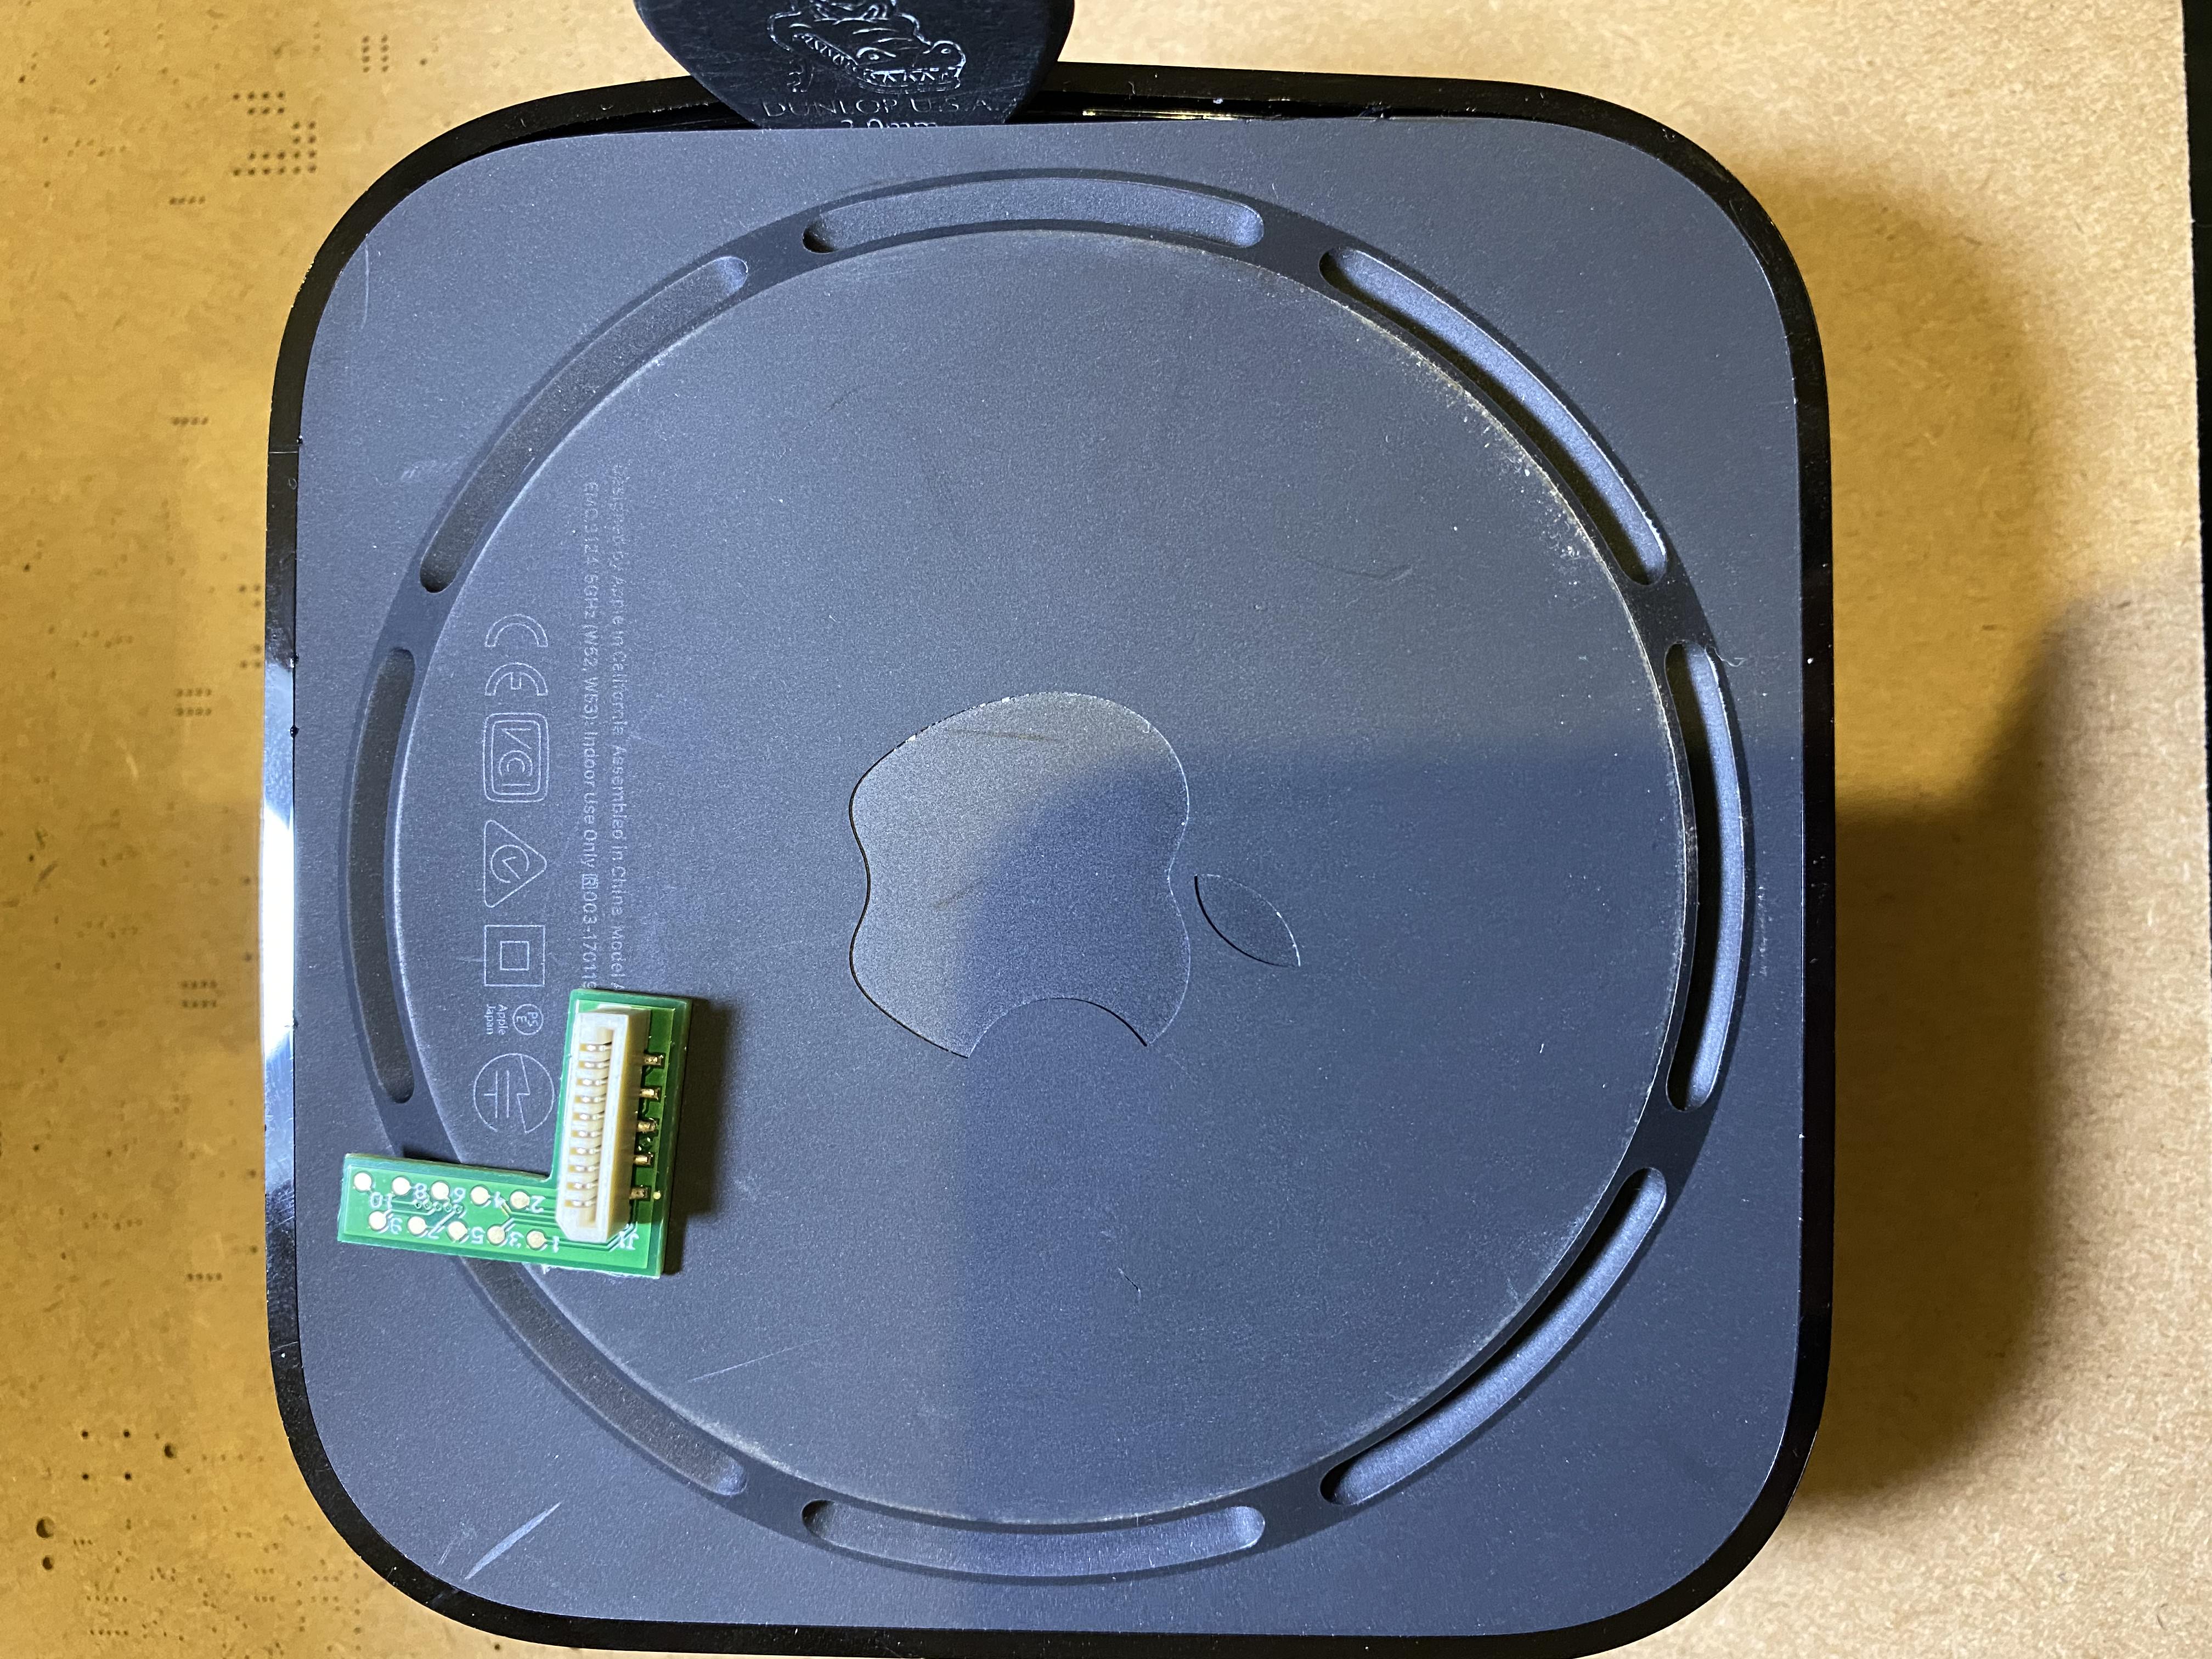
Place the L-shaped board between the HDMI and Ethernet ports as shown. The board will be a tight fit so it doesn’t move once installed.
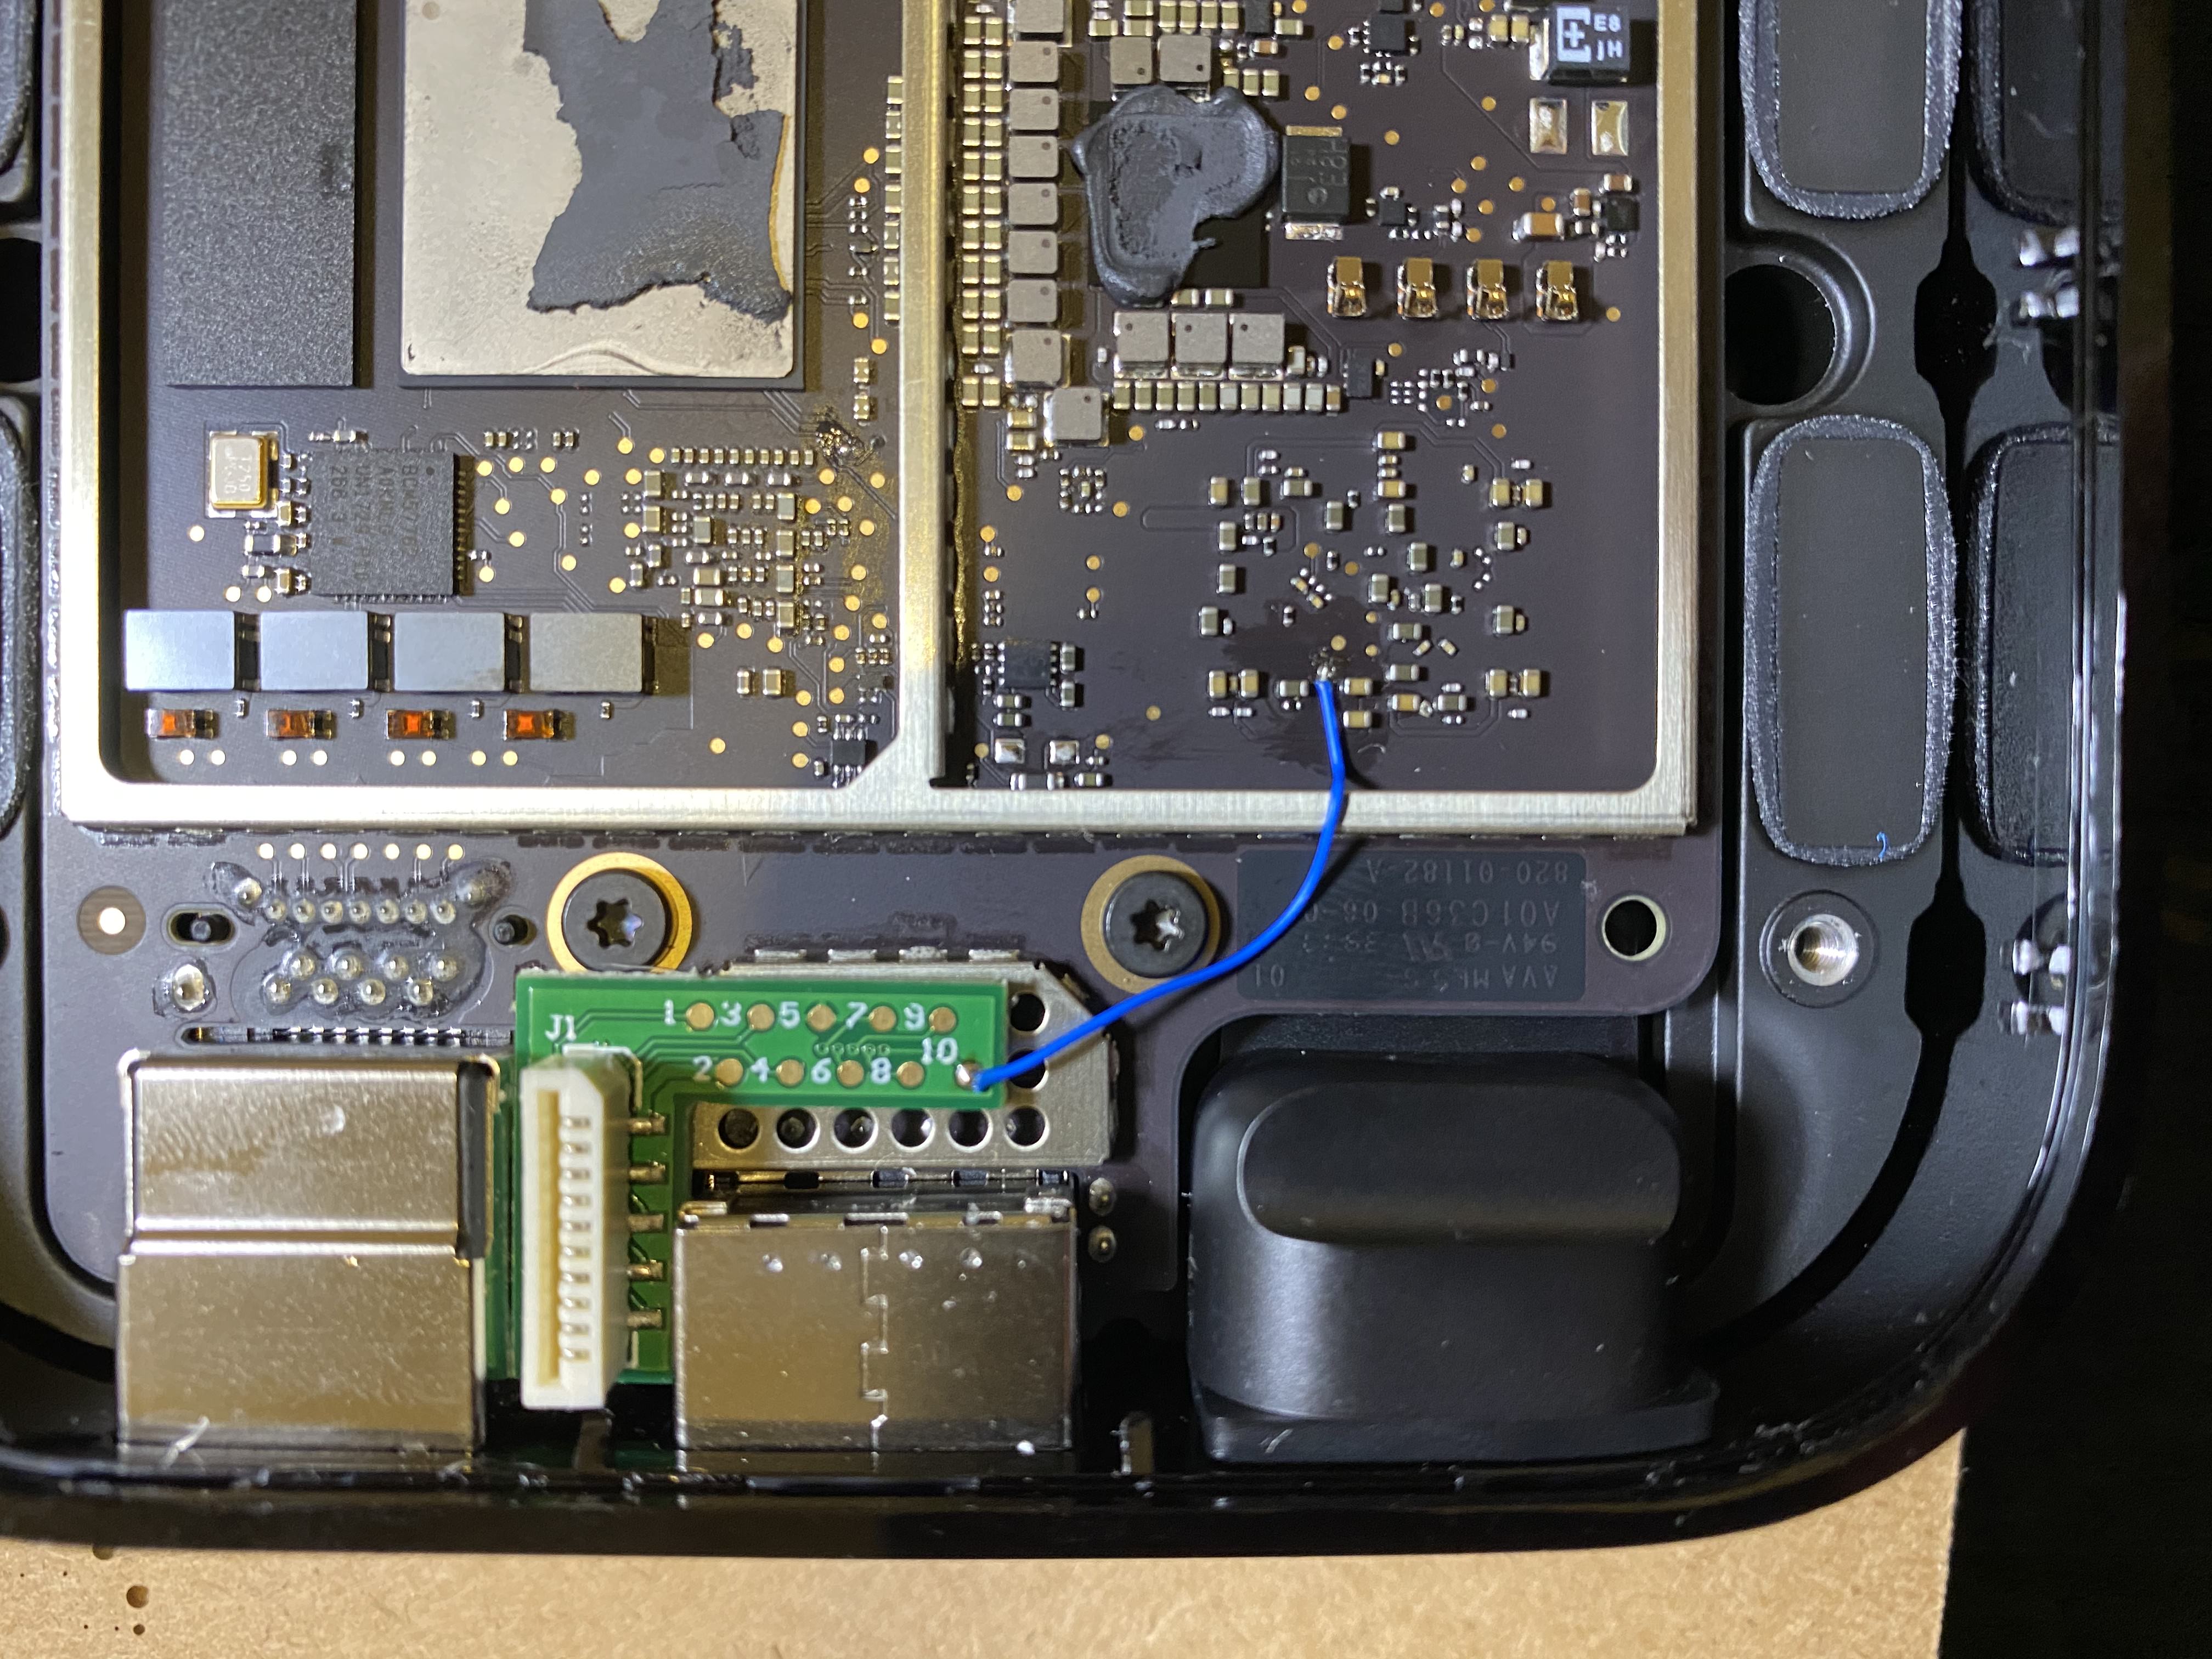
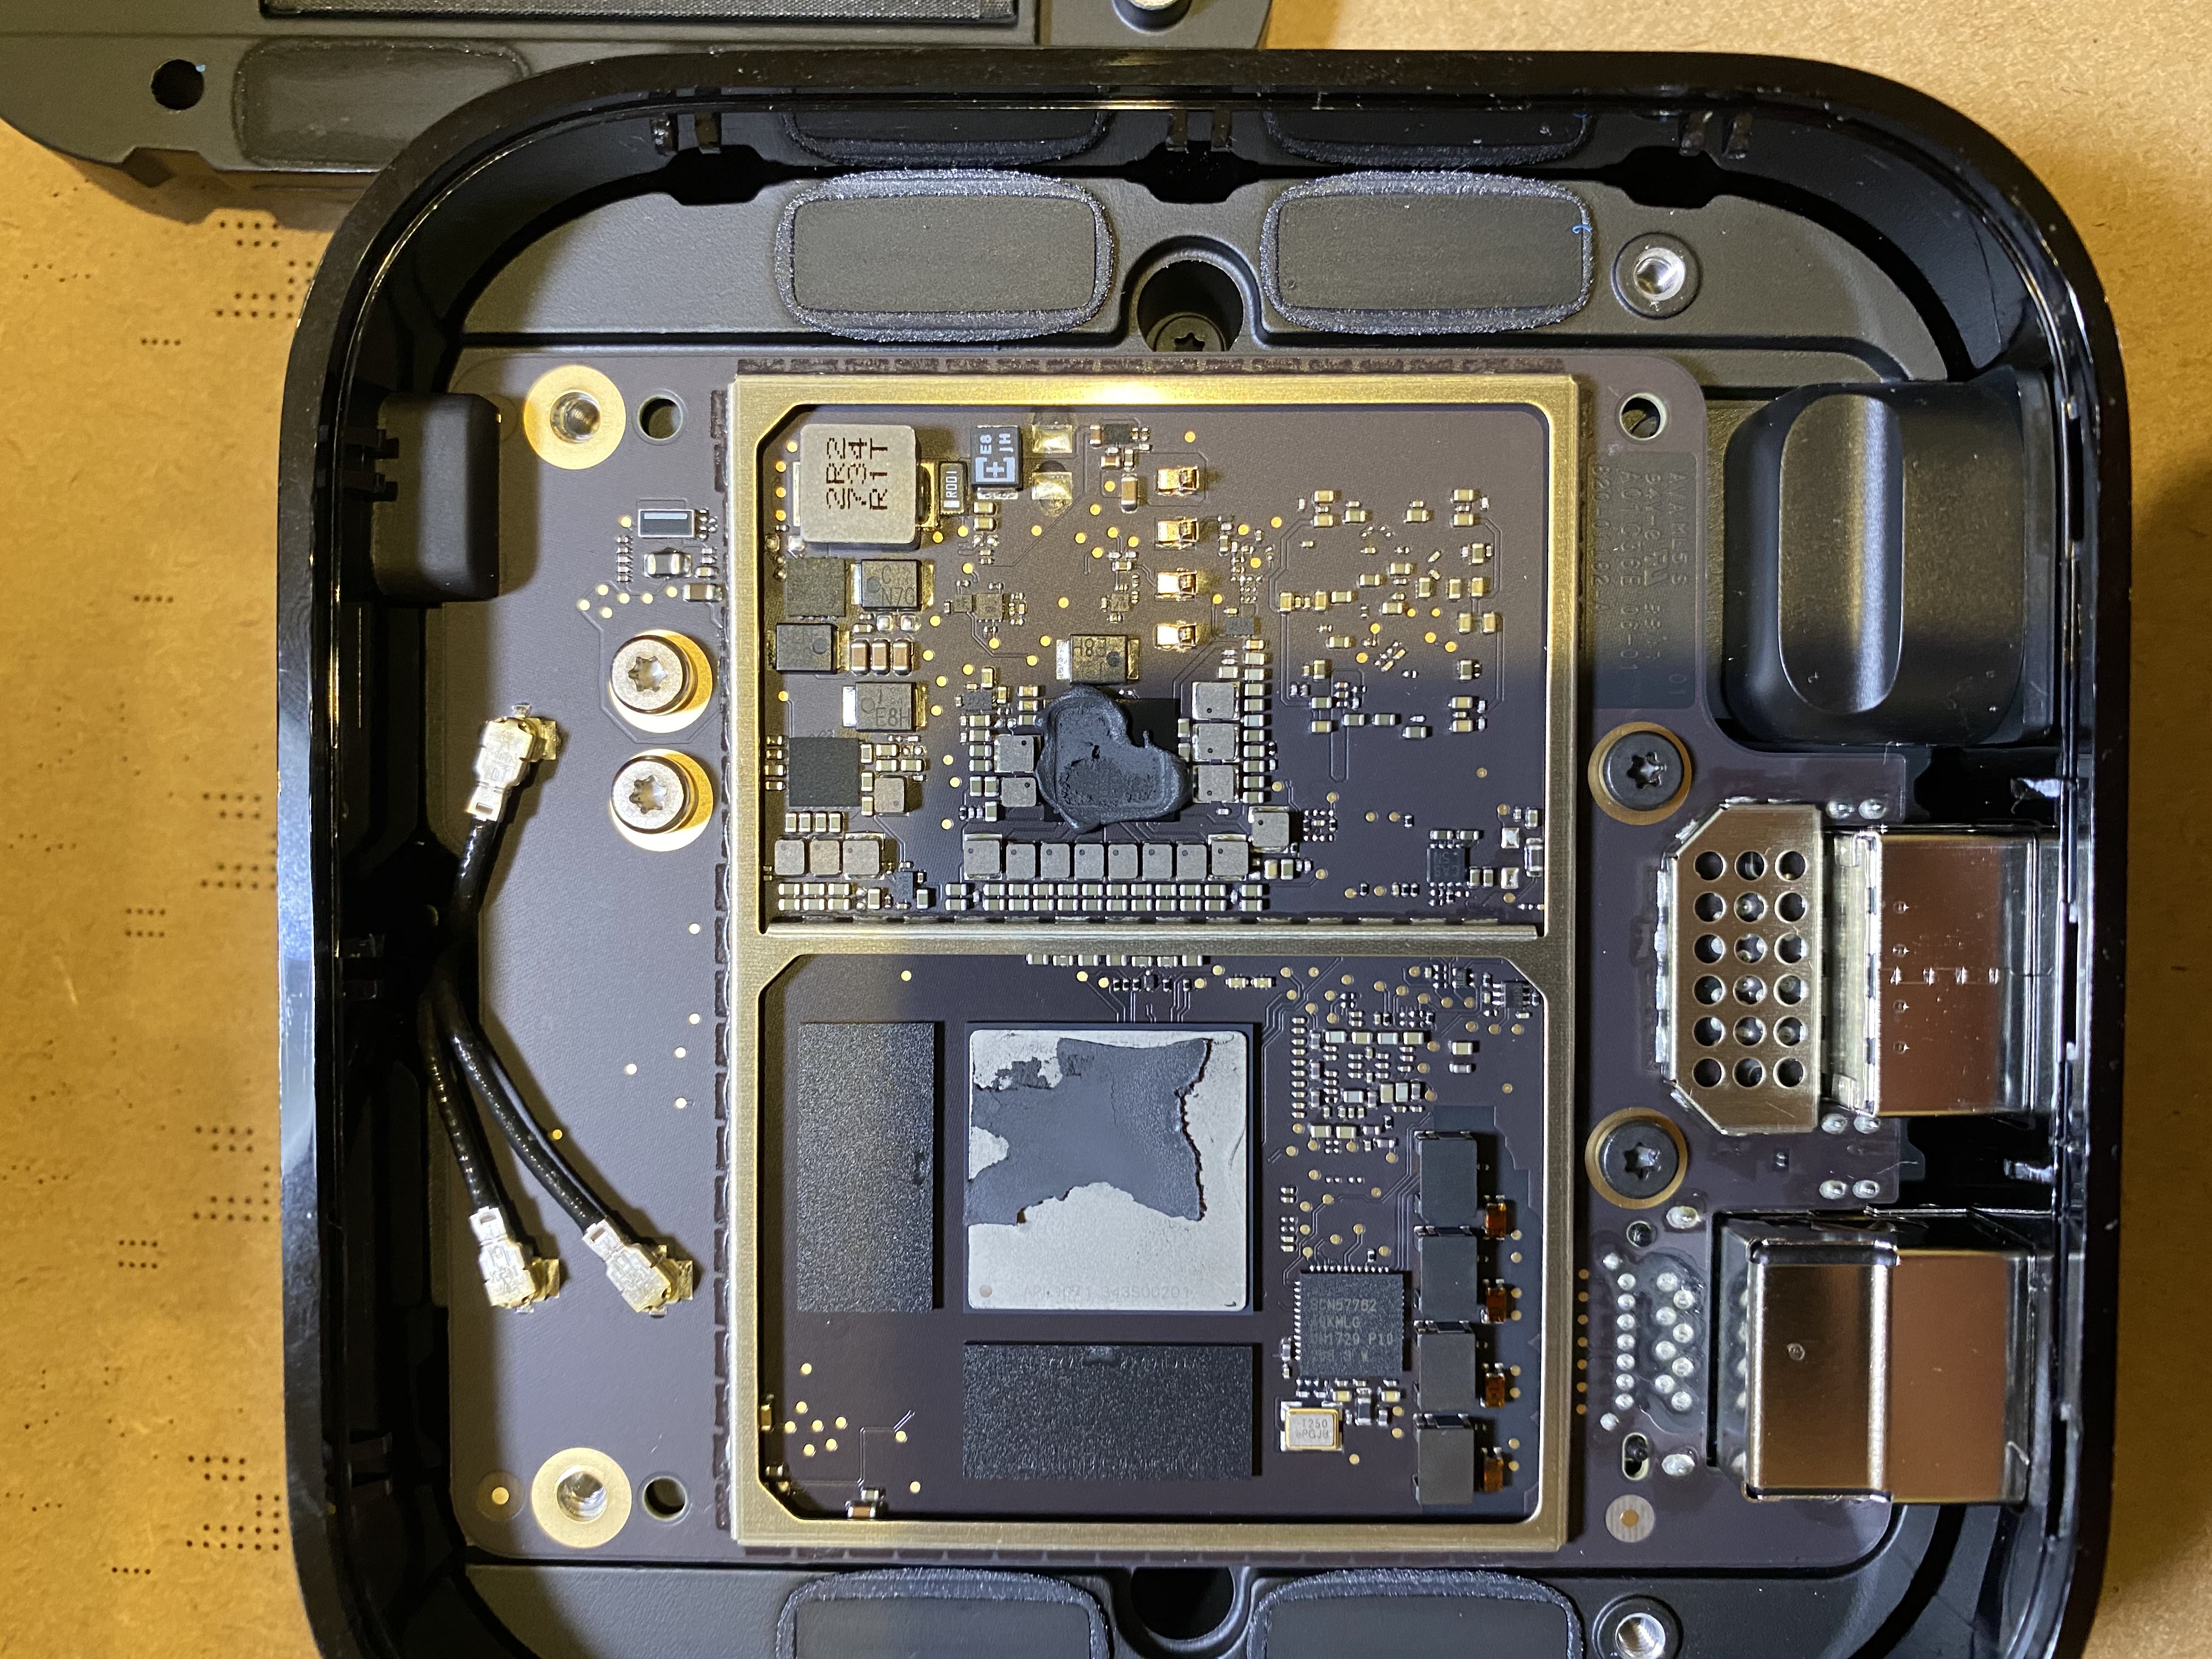
Connect solder point 10 to the point shown in the above picture. This point is required for operation of the DFU button and must be connected correctly.
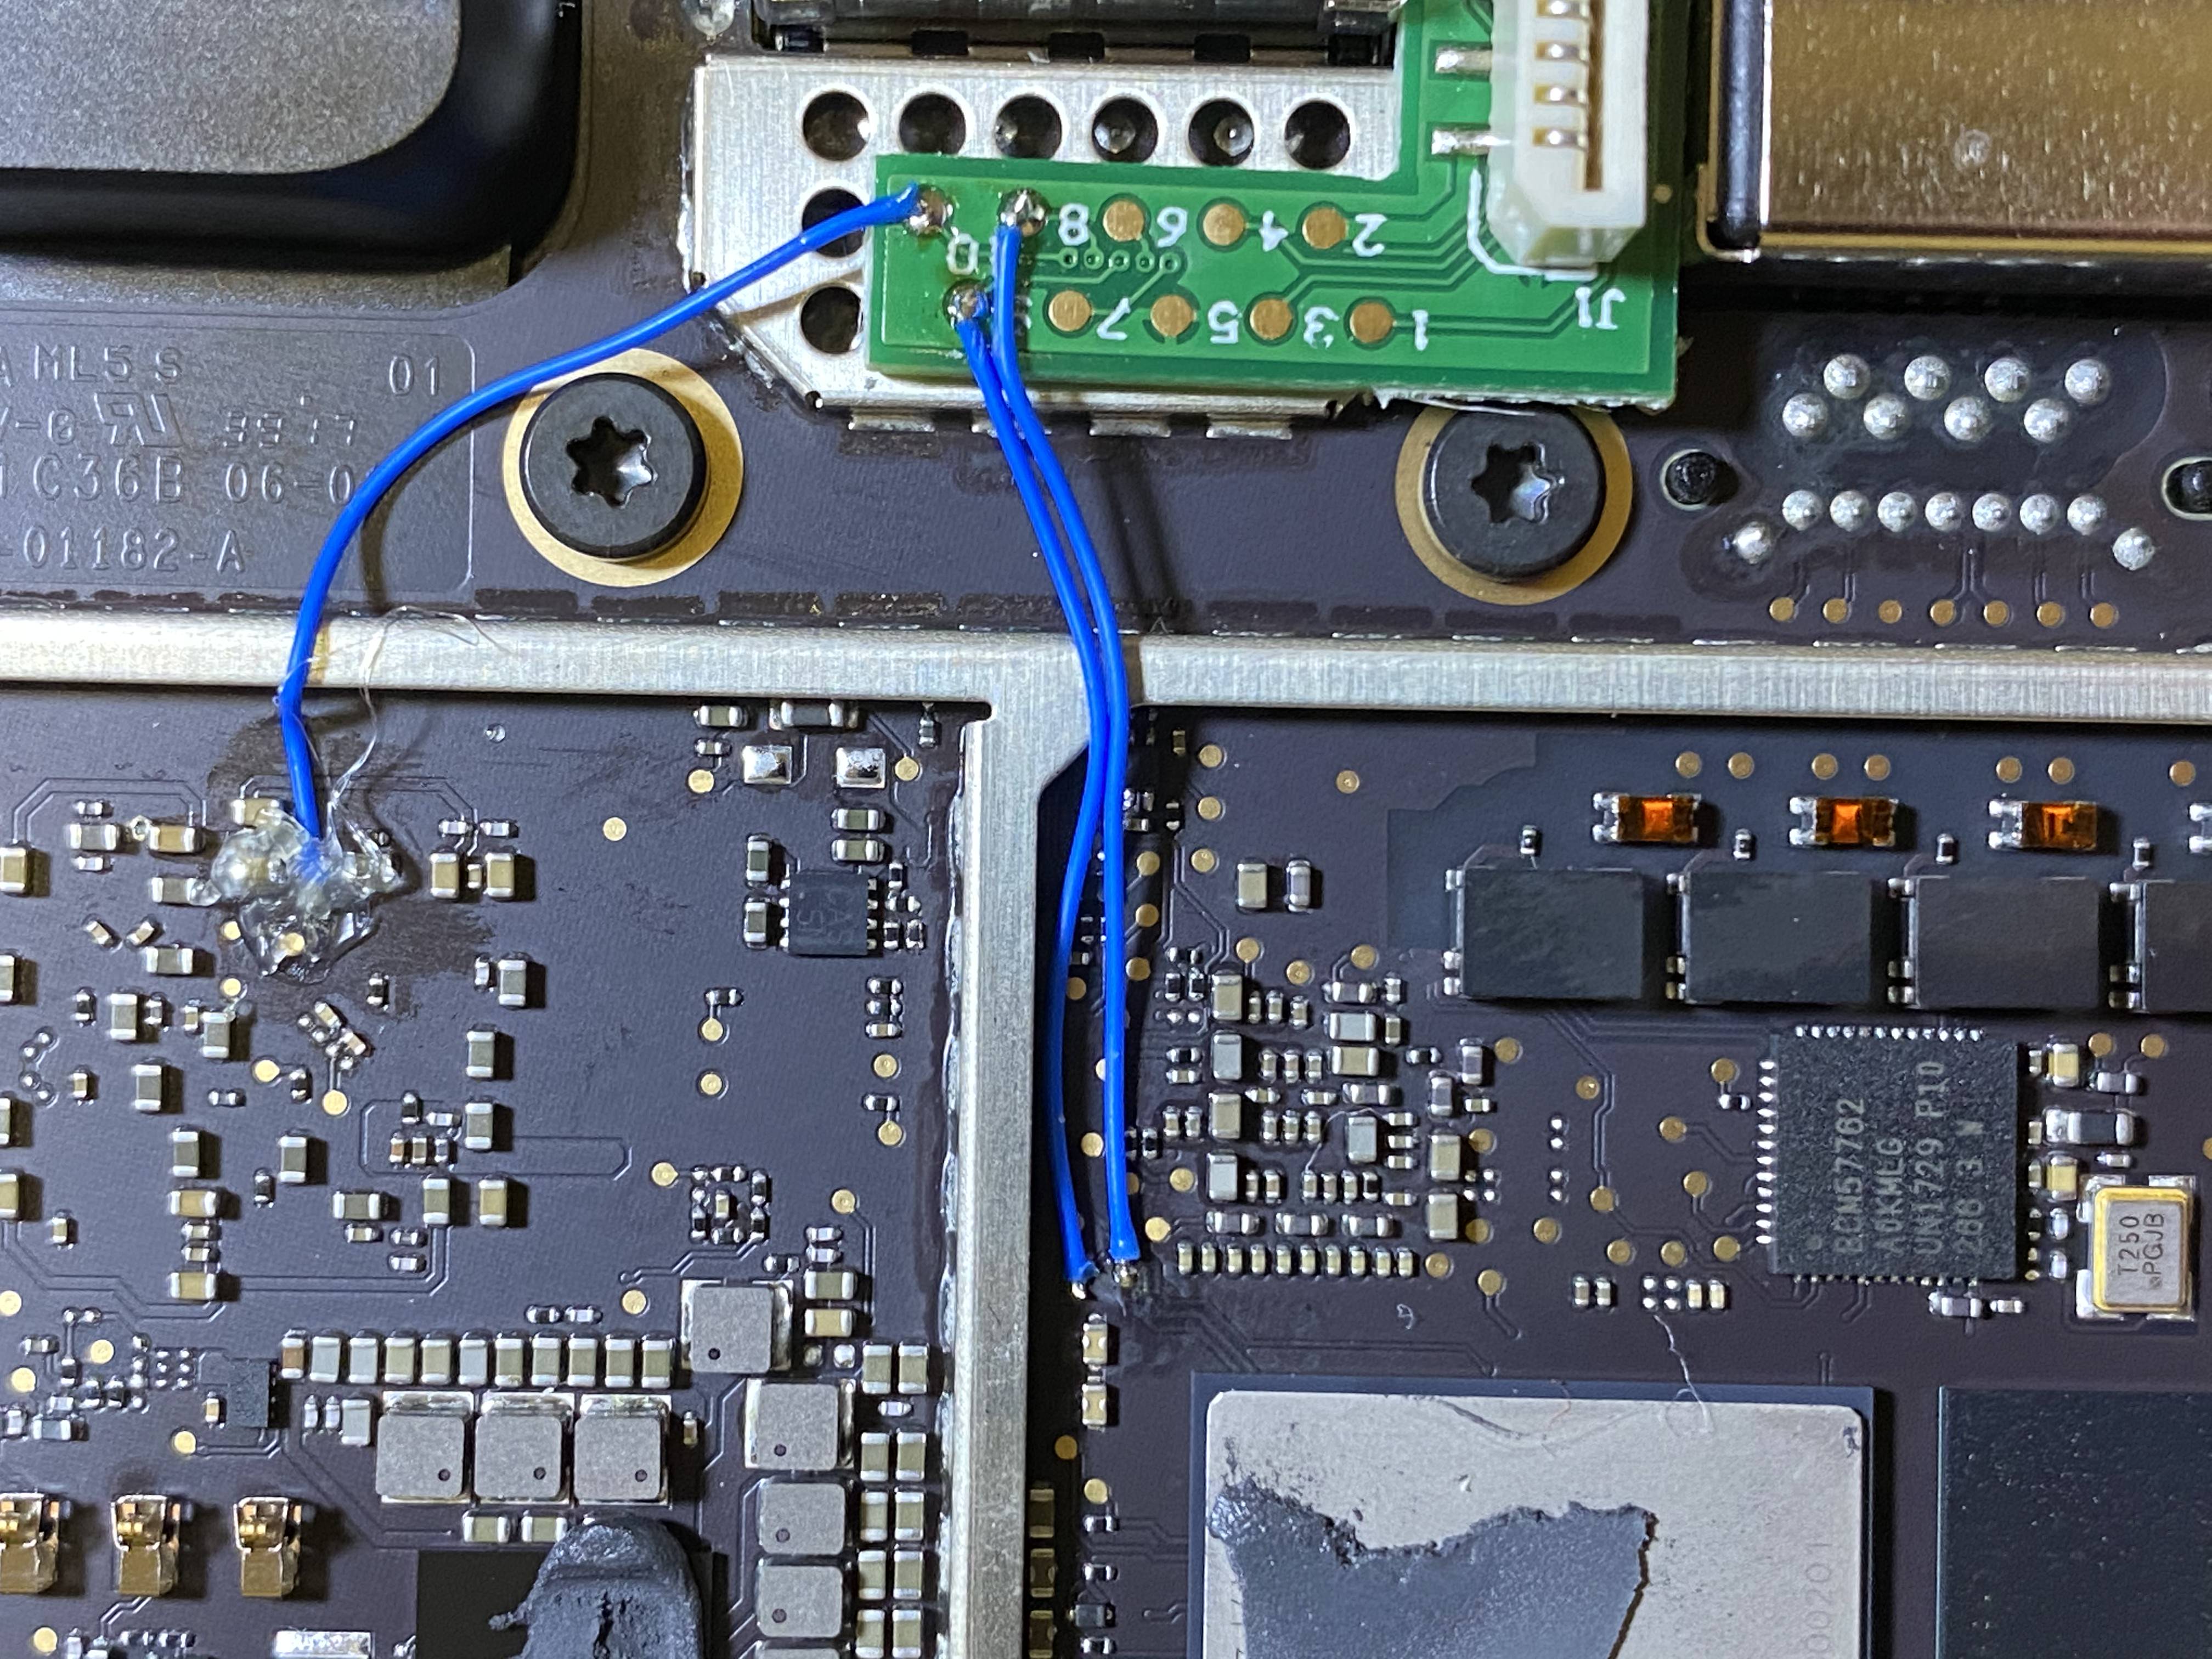
Solder points 8 and 9 connect to the testpoints shown above near the SoC. These points are for UART and are optional, but recommended for future applications using the breakout.
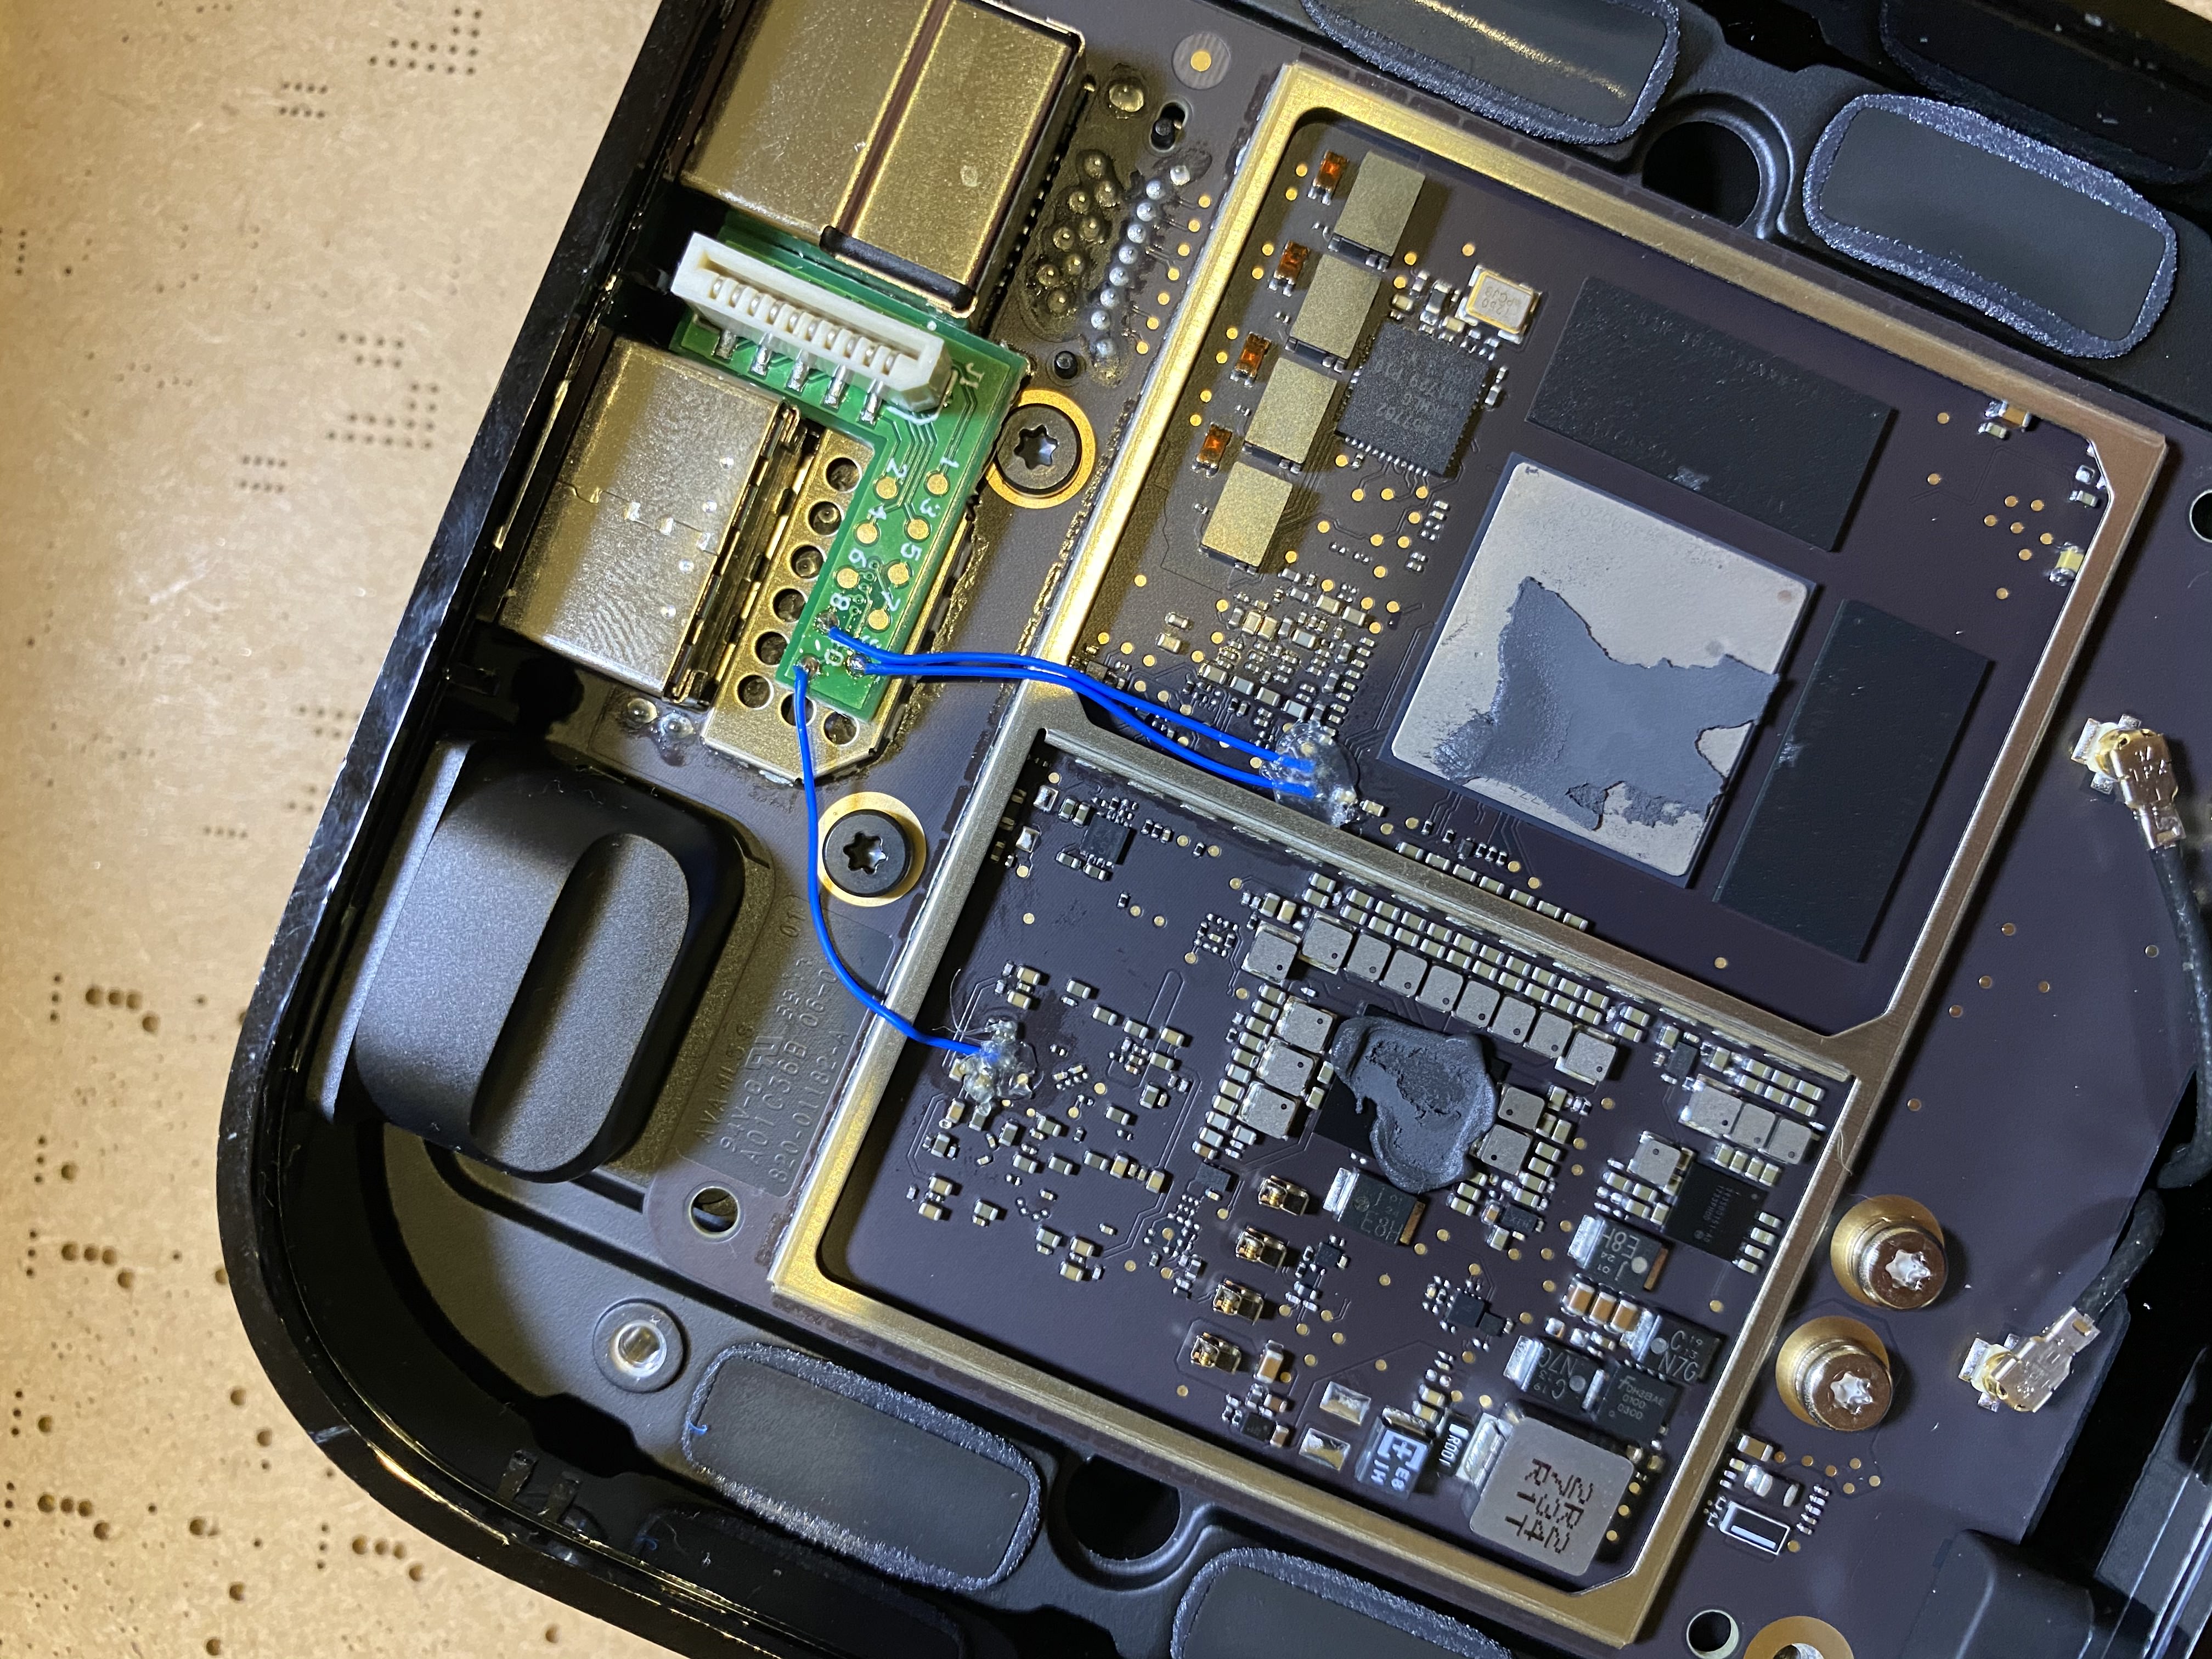
Secure the 3 points with hot glue to prevent potential damage to the Apple TV.
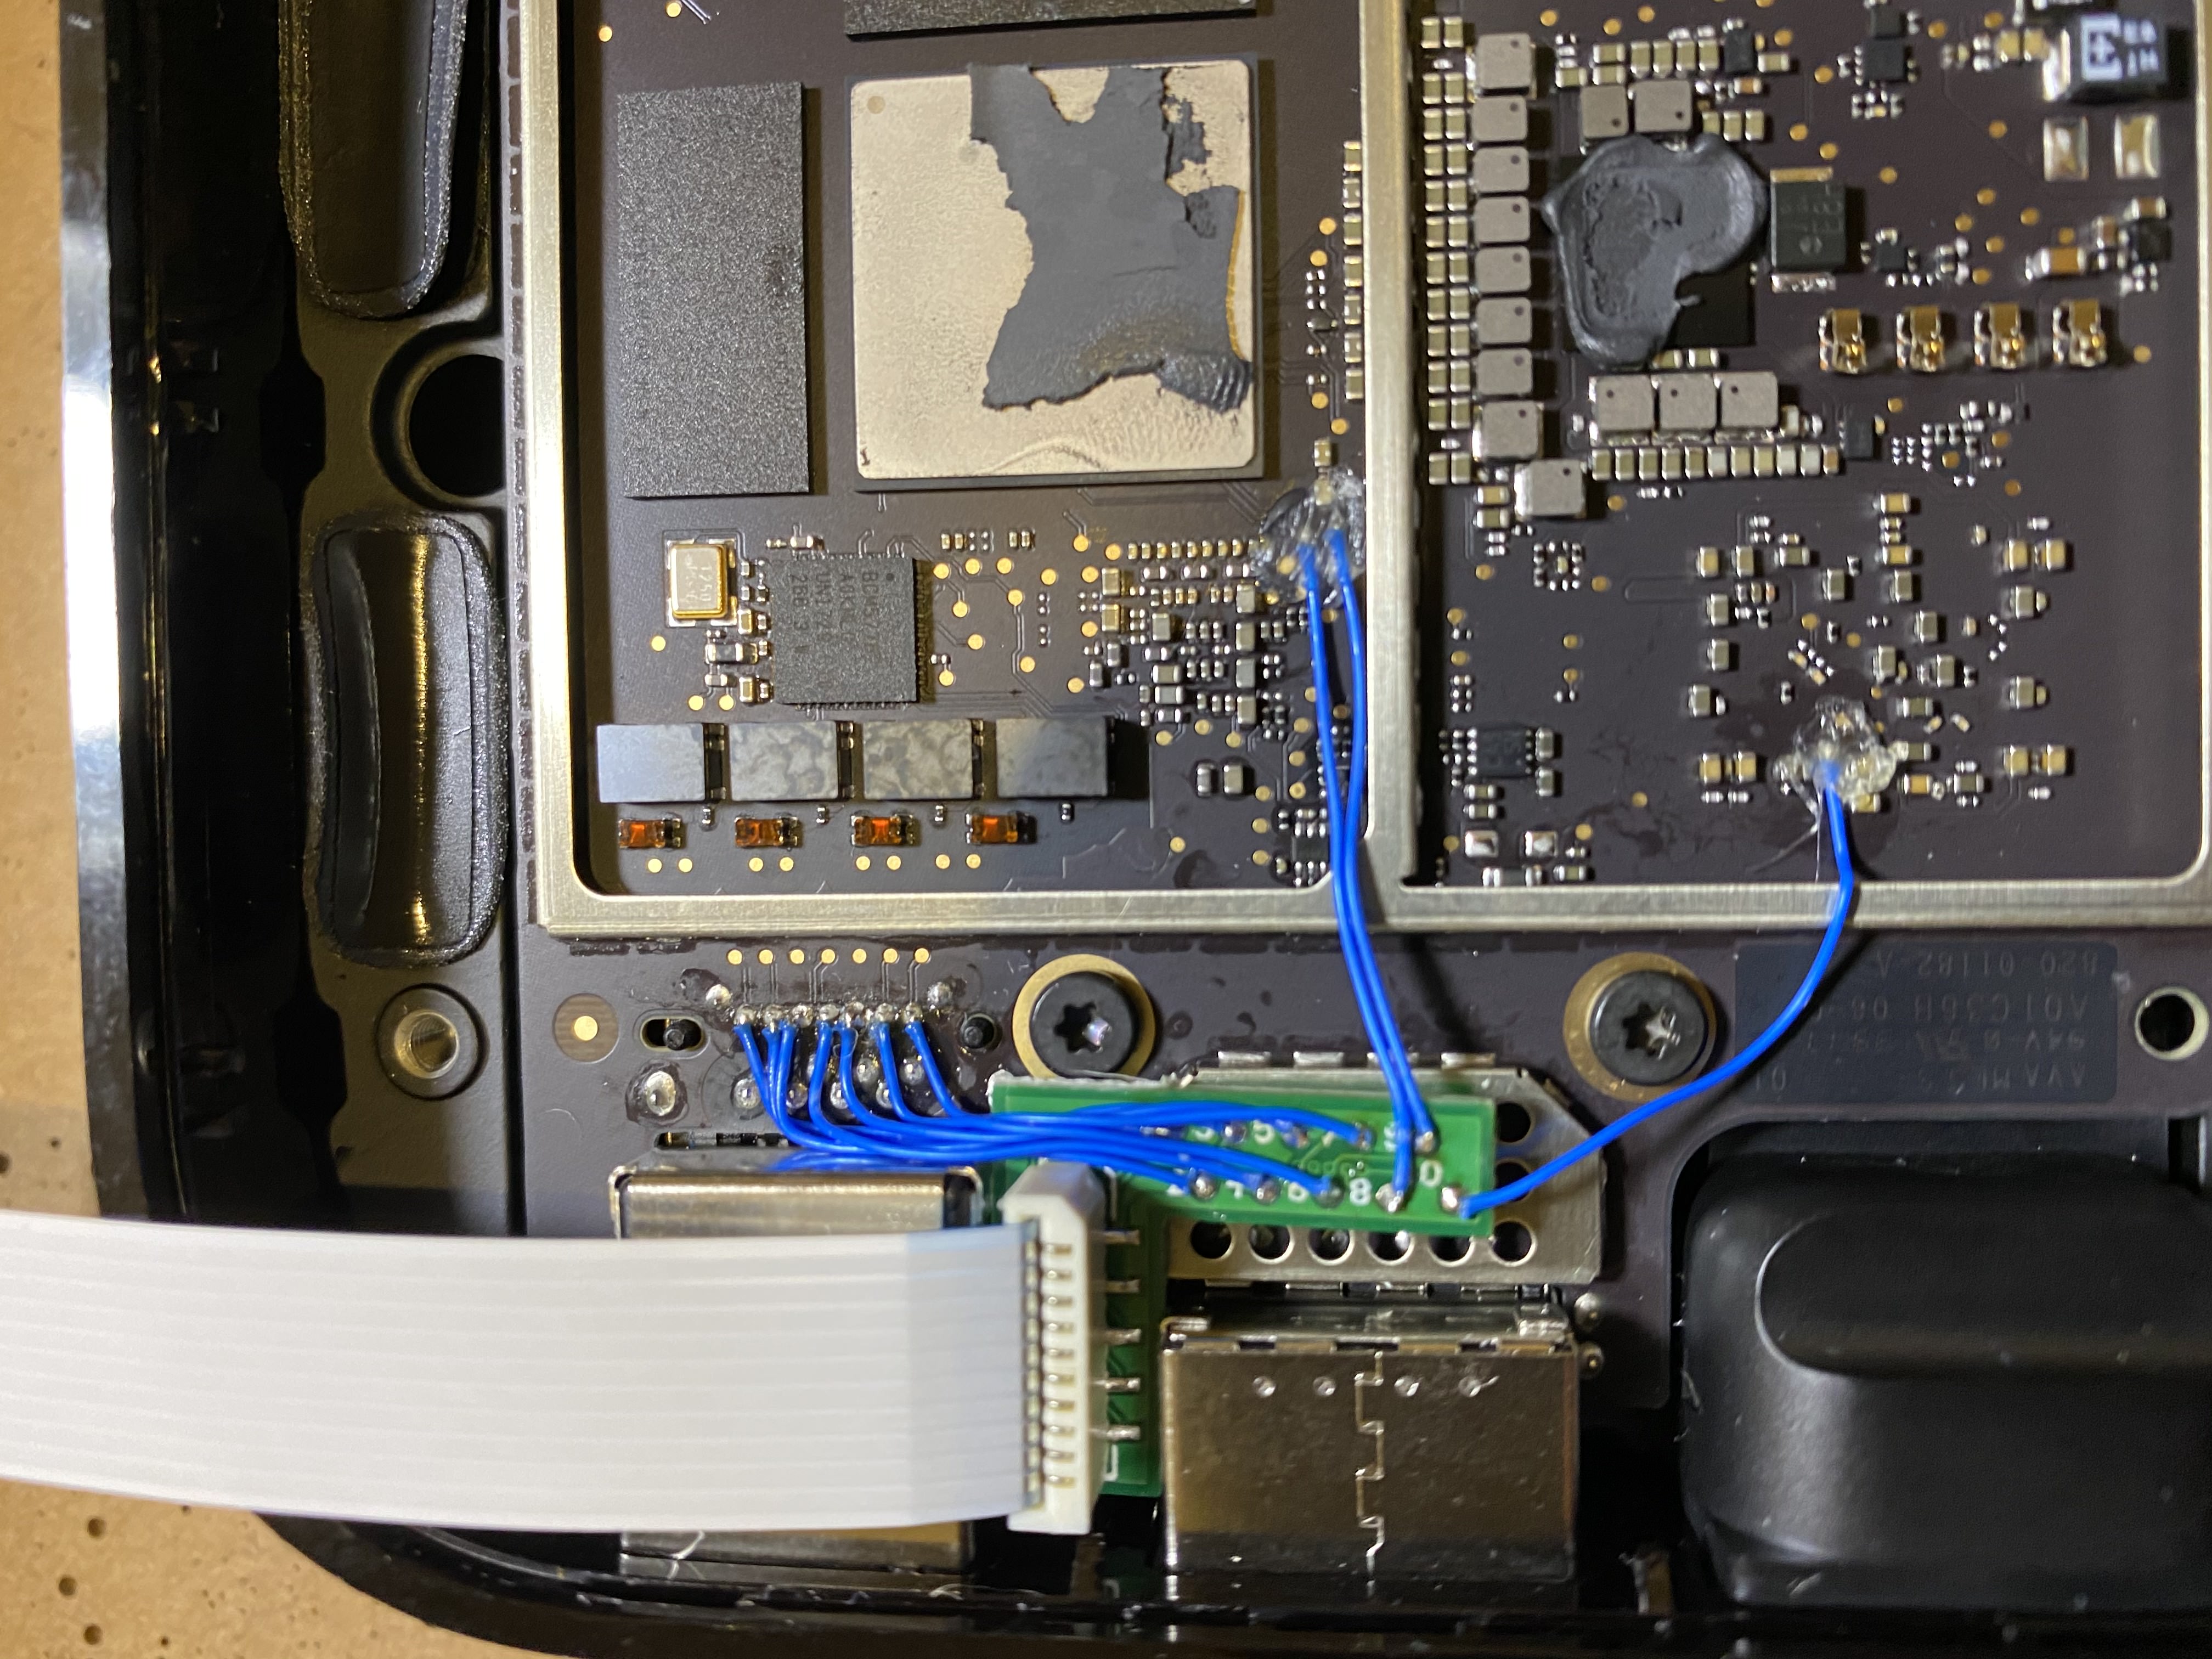
Starting from the pin on the furthest left when oriented as in the above picture connect pins from the debug connector from 1 to 7. Pins 1 and 7 are currently unused but recommended for future applications.
Pins 2 and 6 are required for the advanced breakout, but recommended for future applications even if you don’t intend on using the advanced breakout.
Pins 3 and 4 are required for USB access.
Pin 5 is ground and required for system stability.
Once fitted insert the FFC with the blue side facing the Ethernet port, then carefully fold it back as shown above.
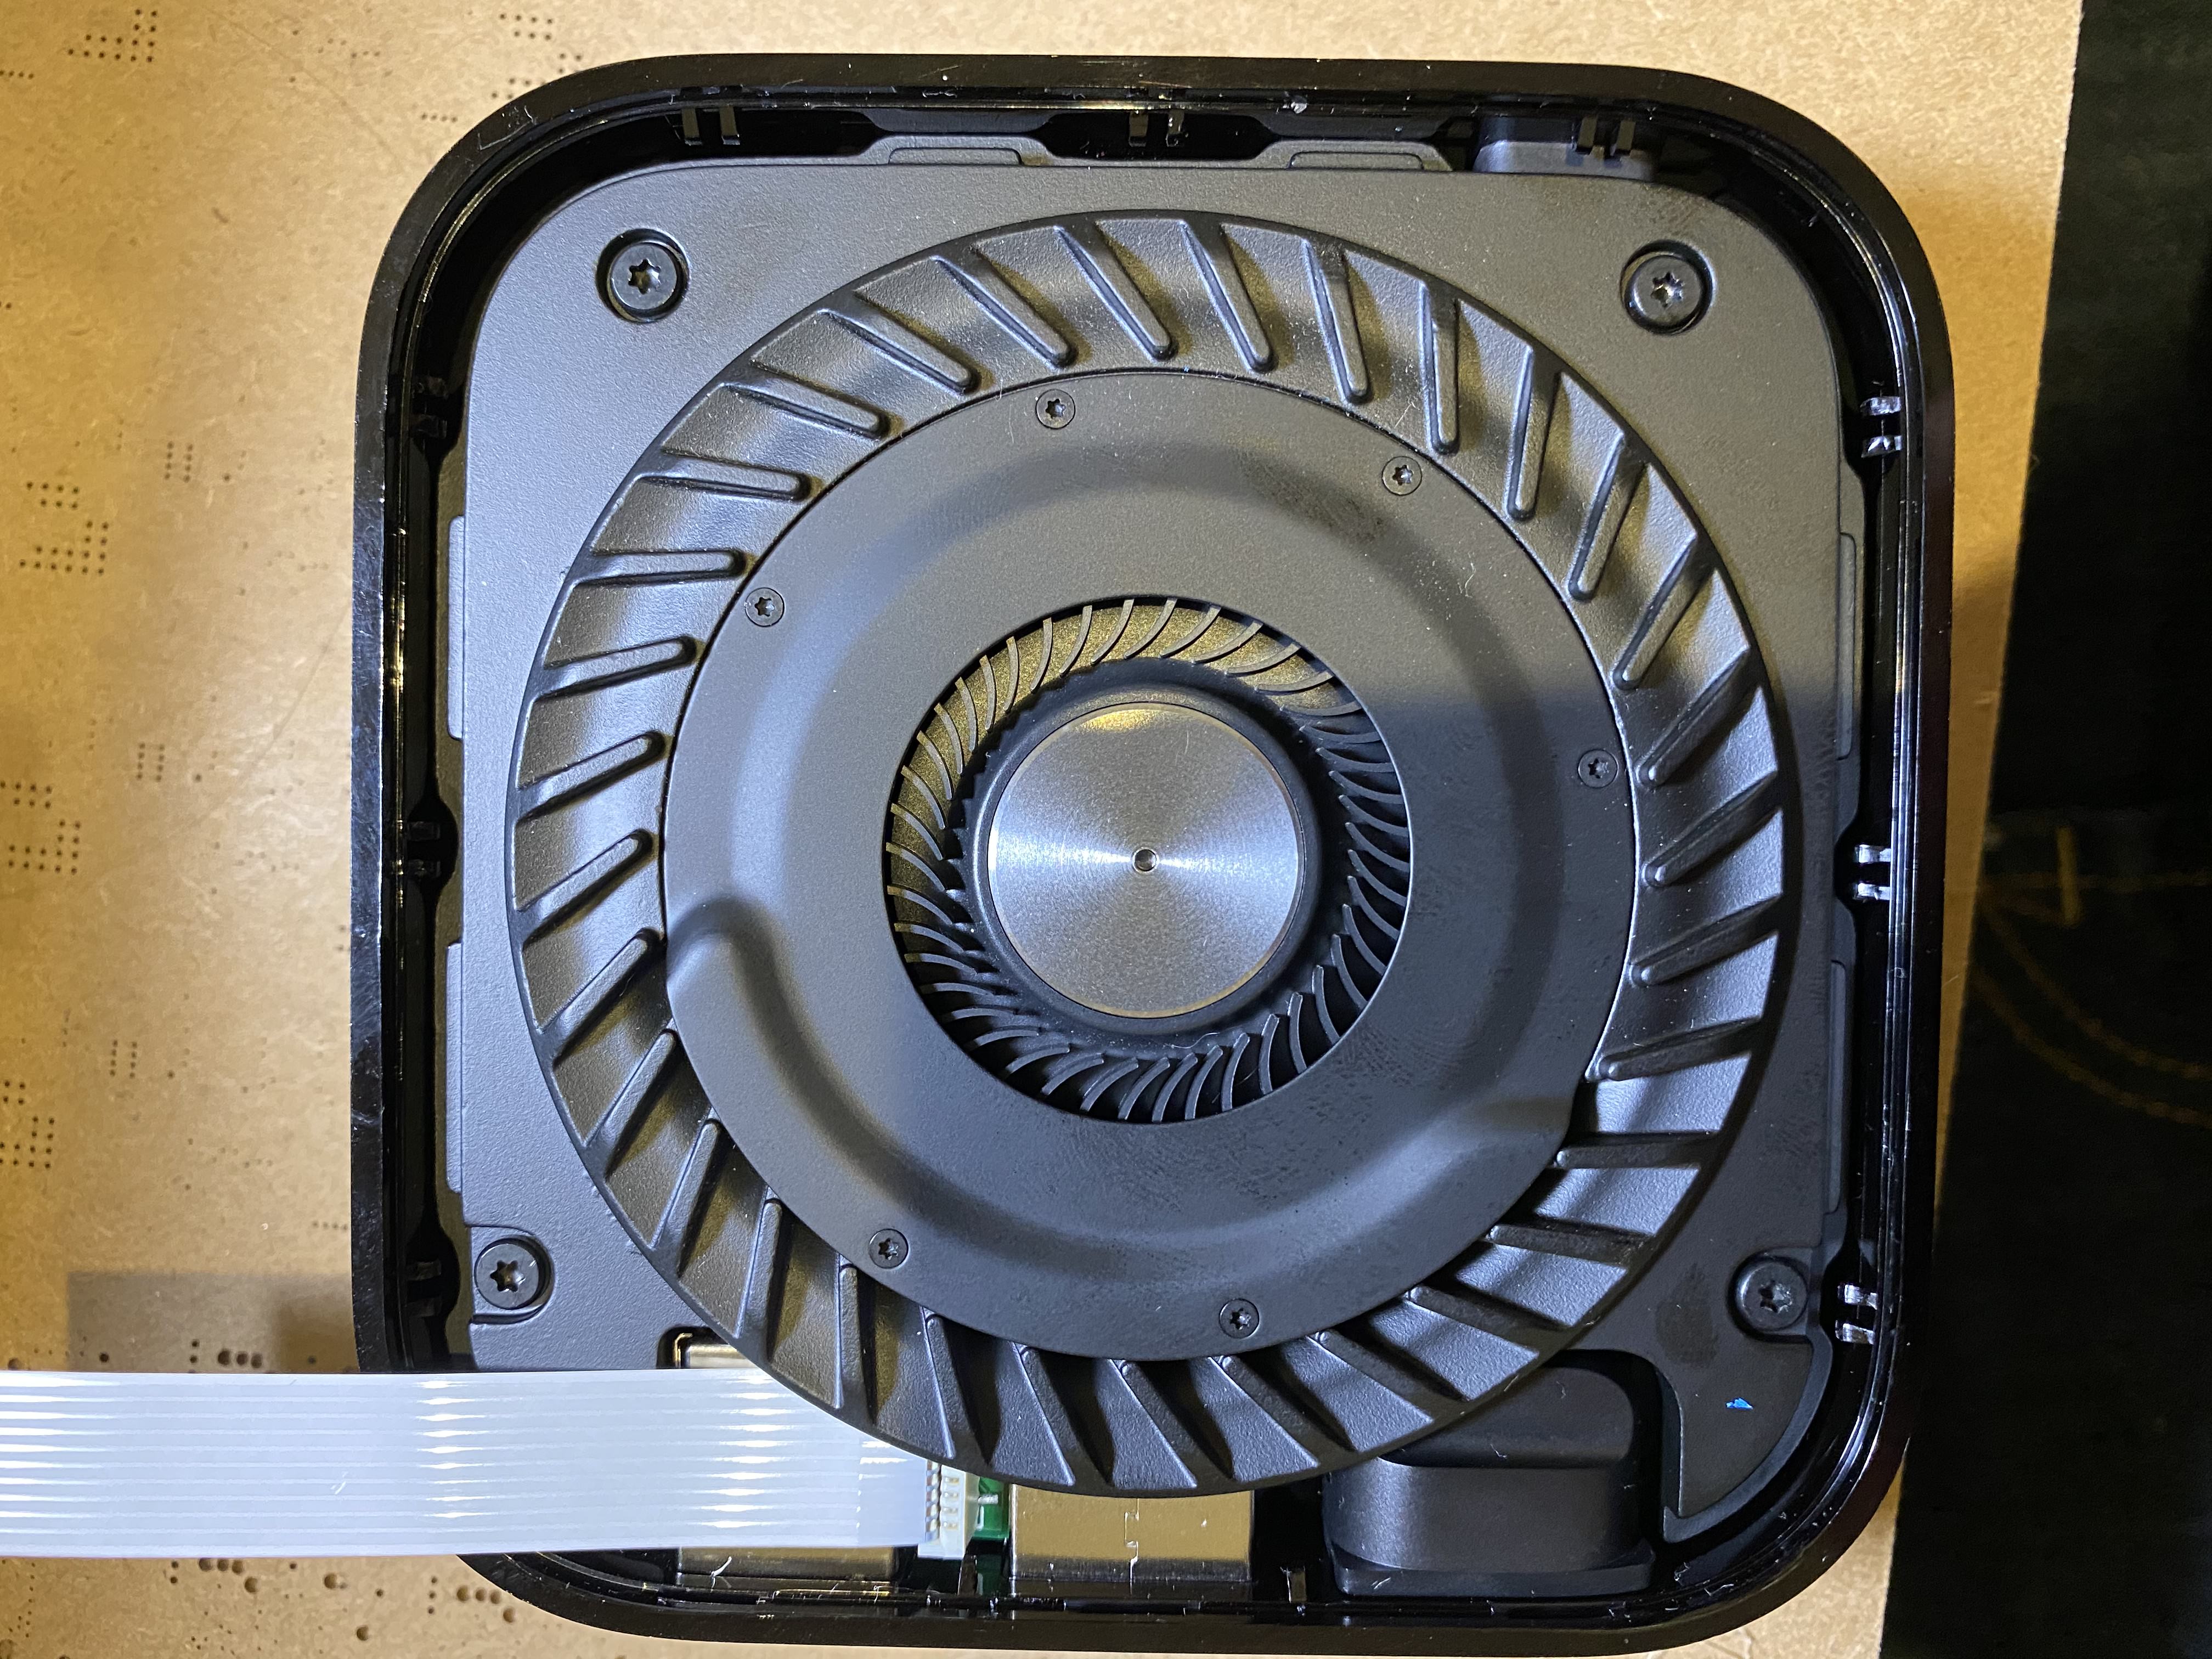
Place the heatsink/fan back in place and screw it down carefully using a cross pattern. The breakout has minimal clearance once tightened down and will now be secured in place.
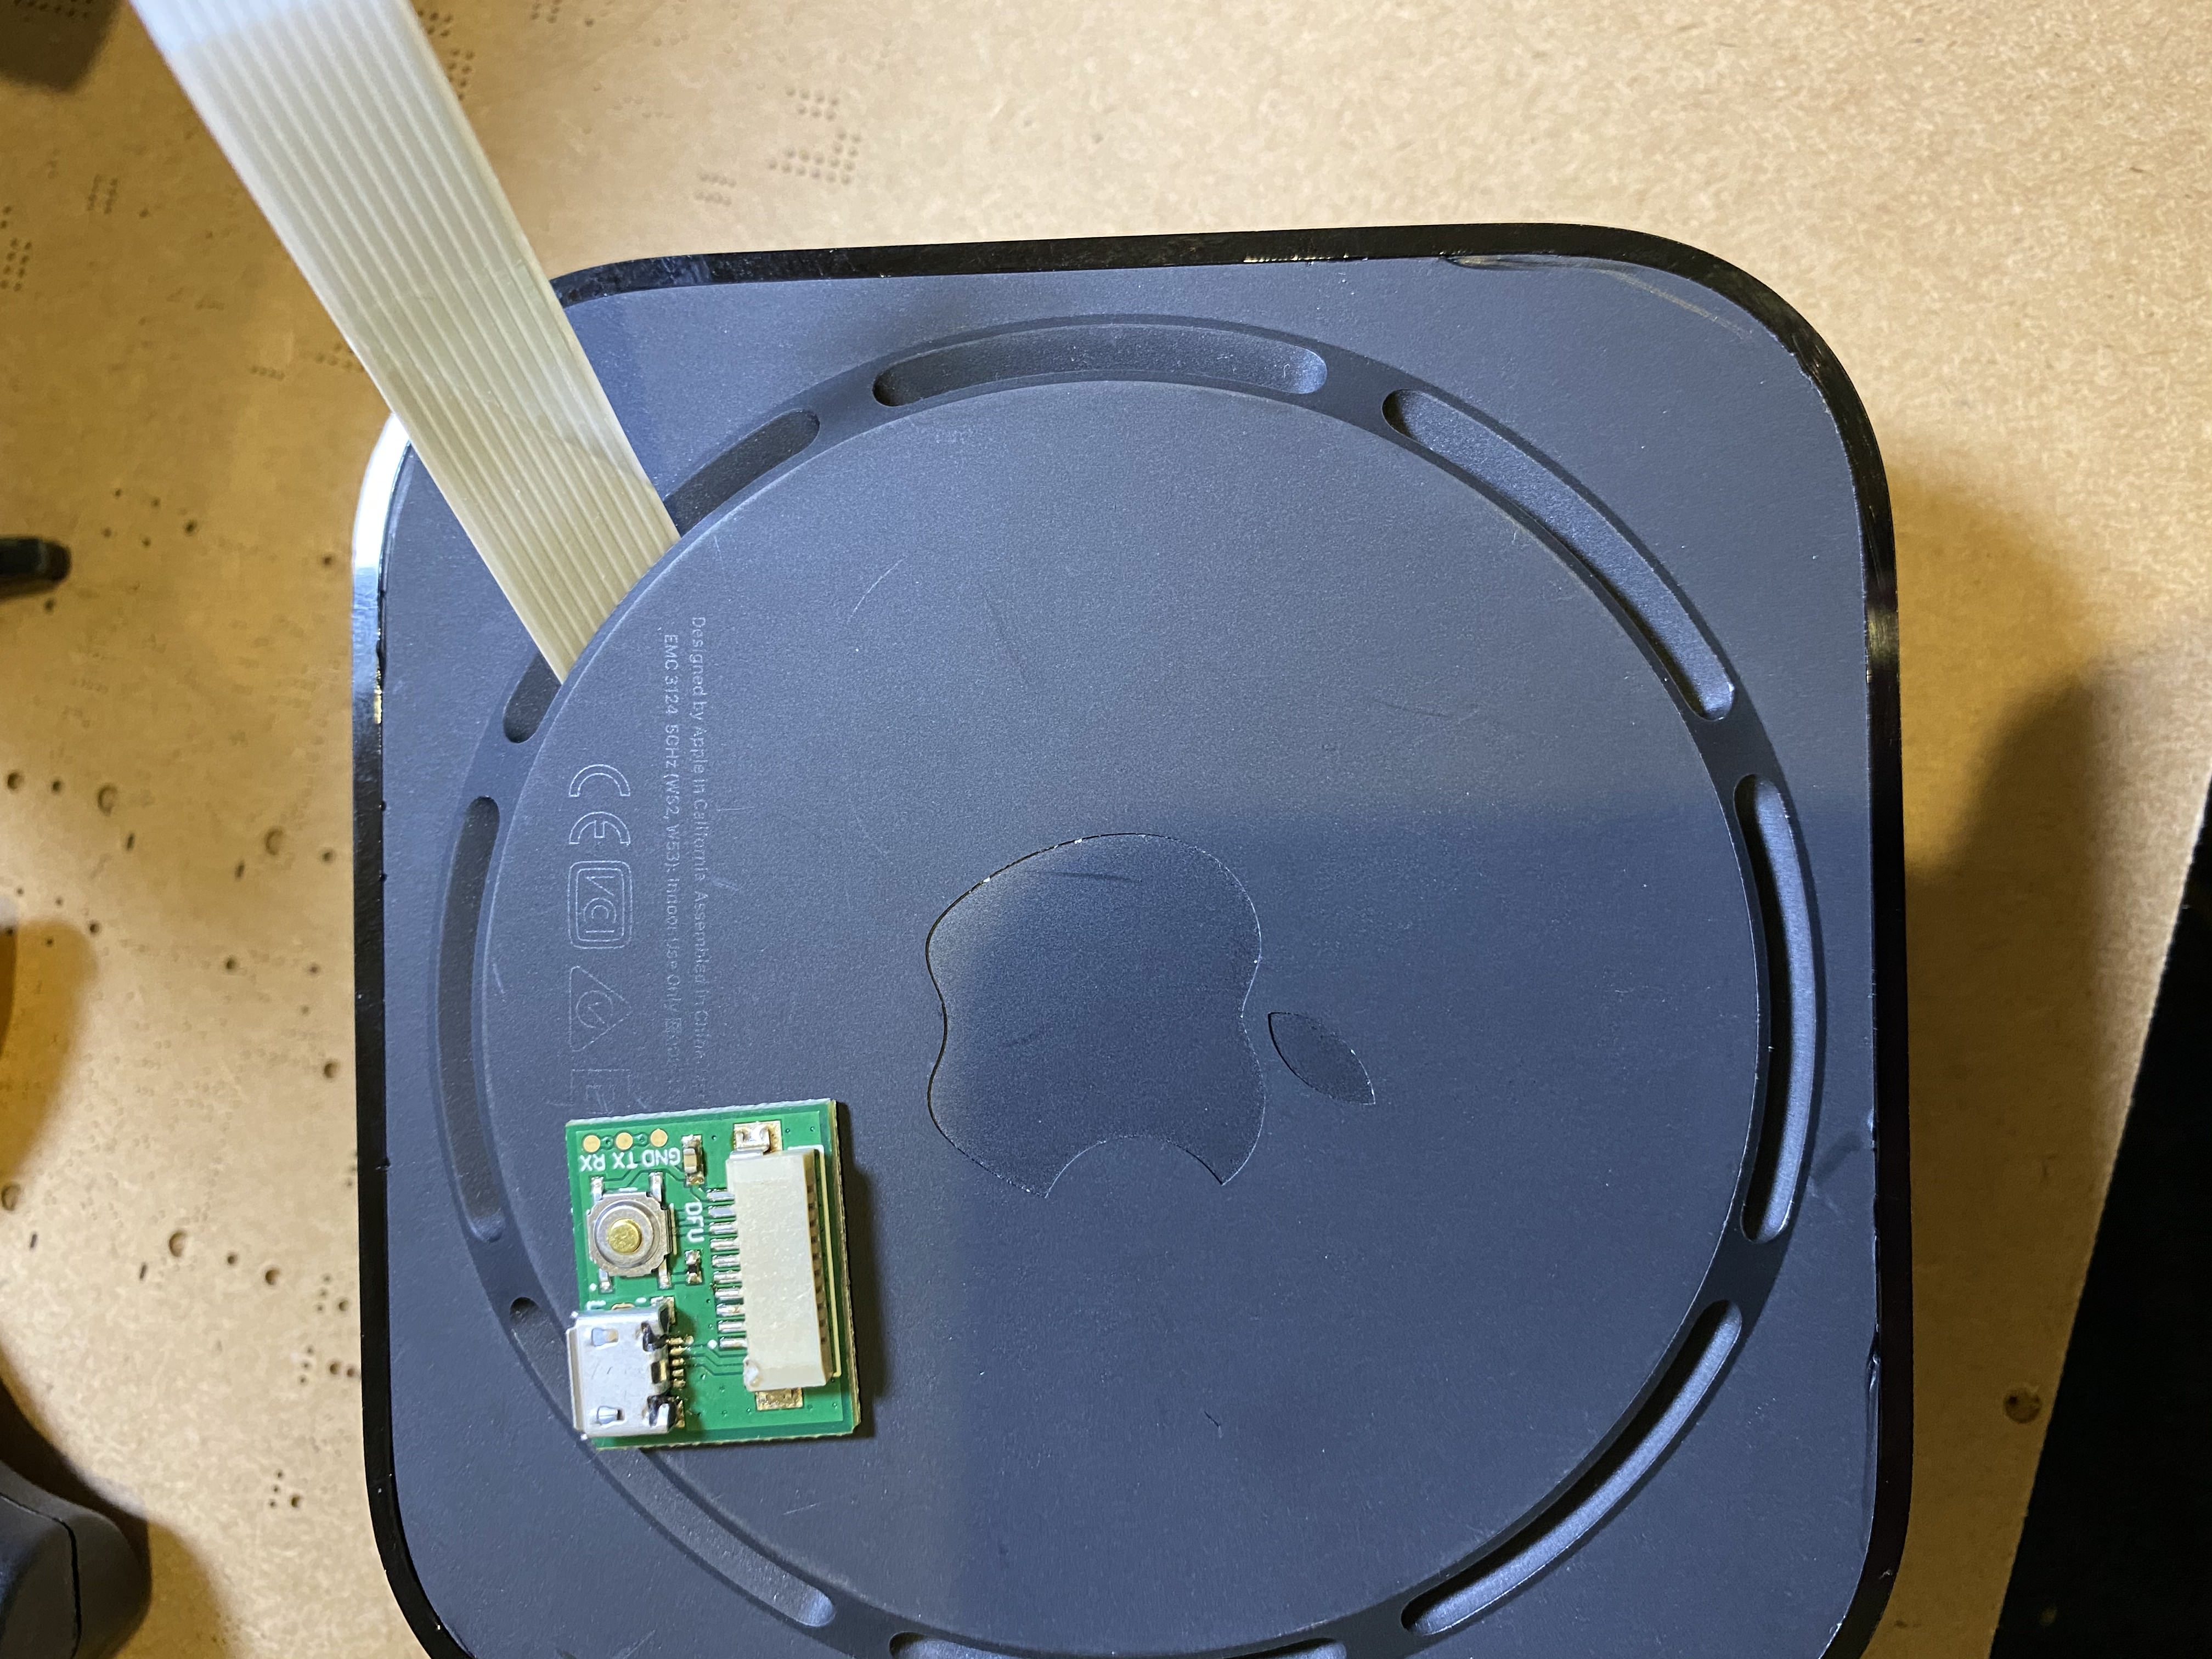
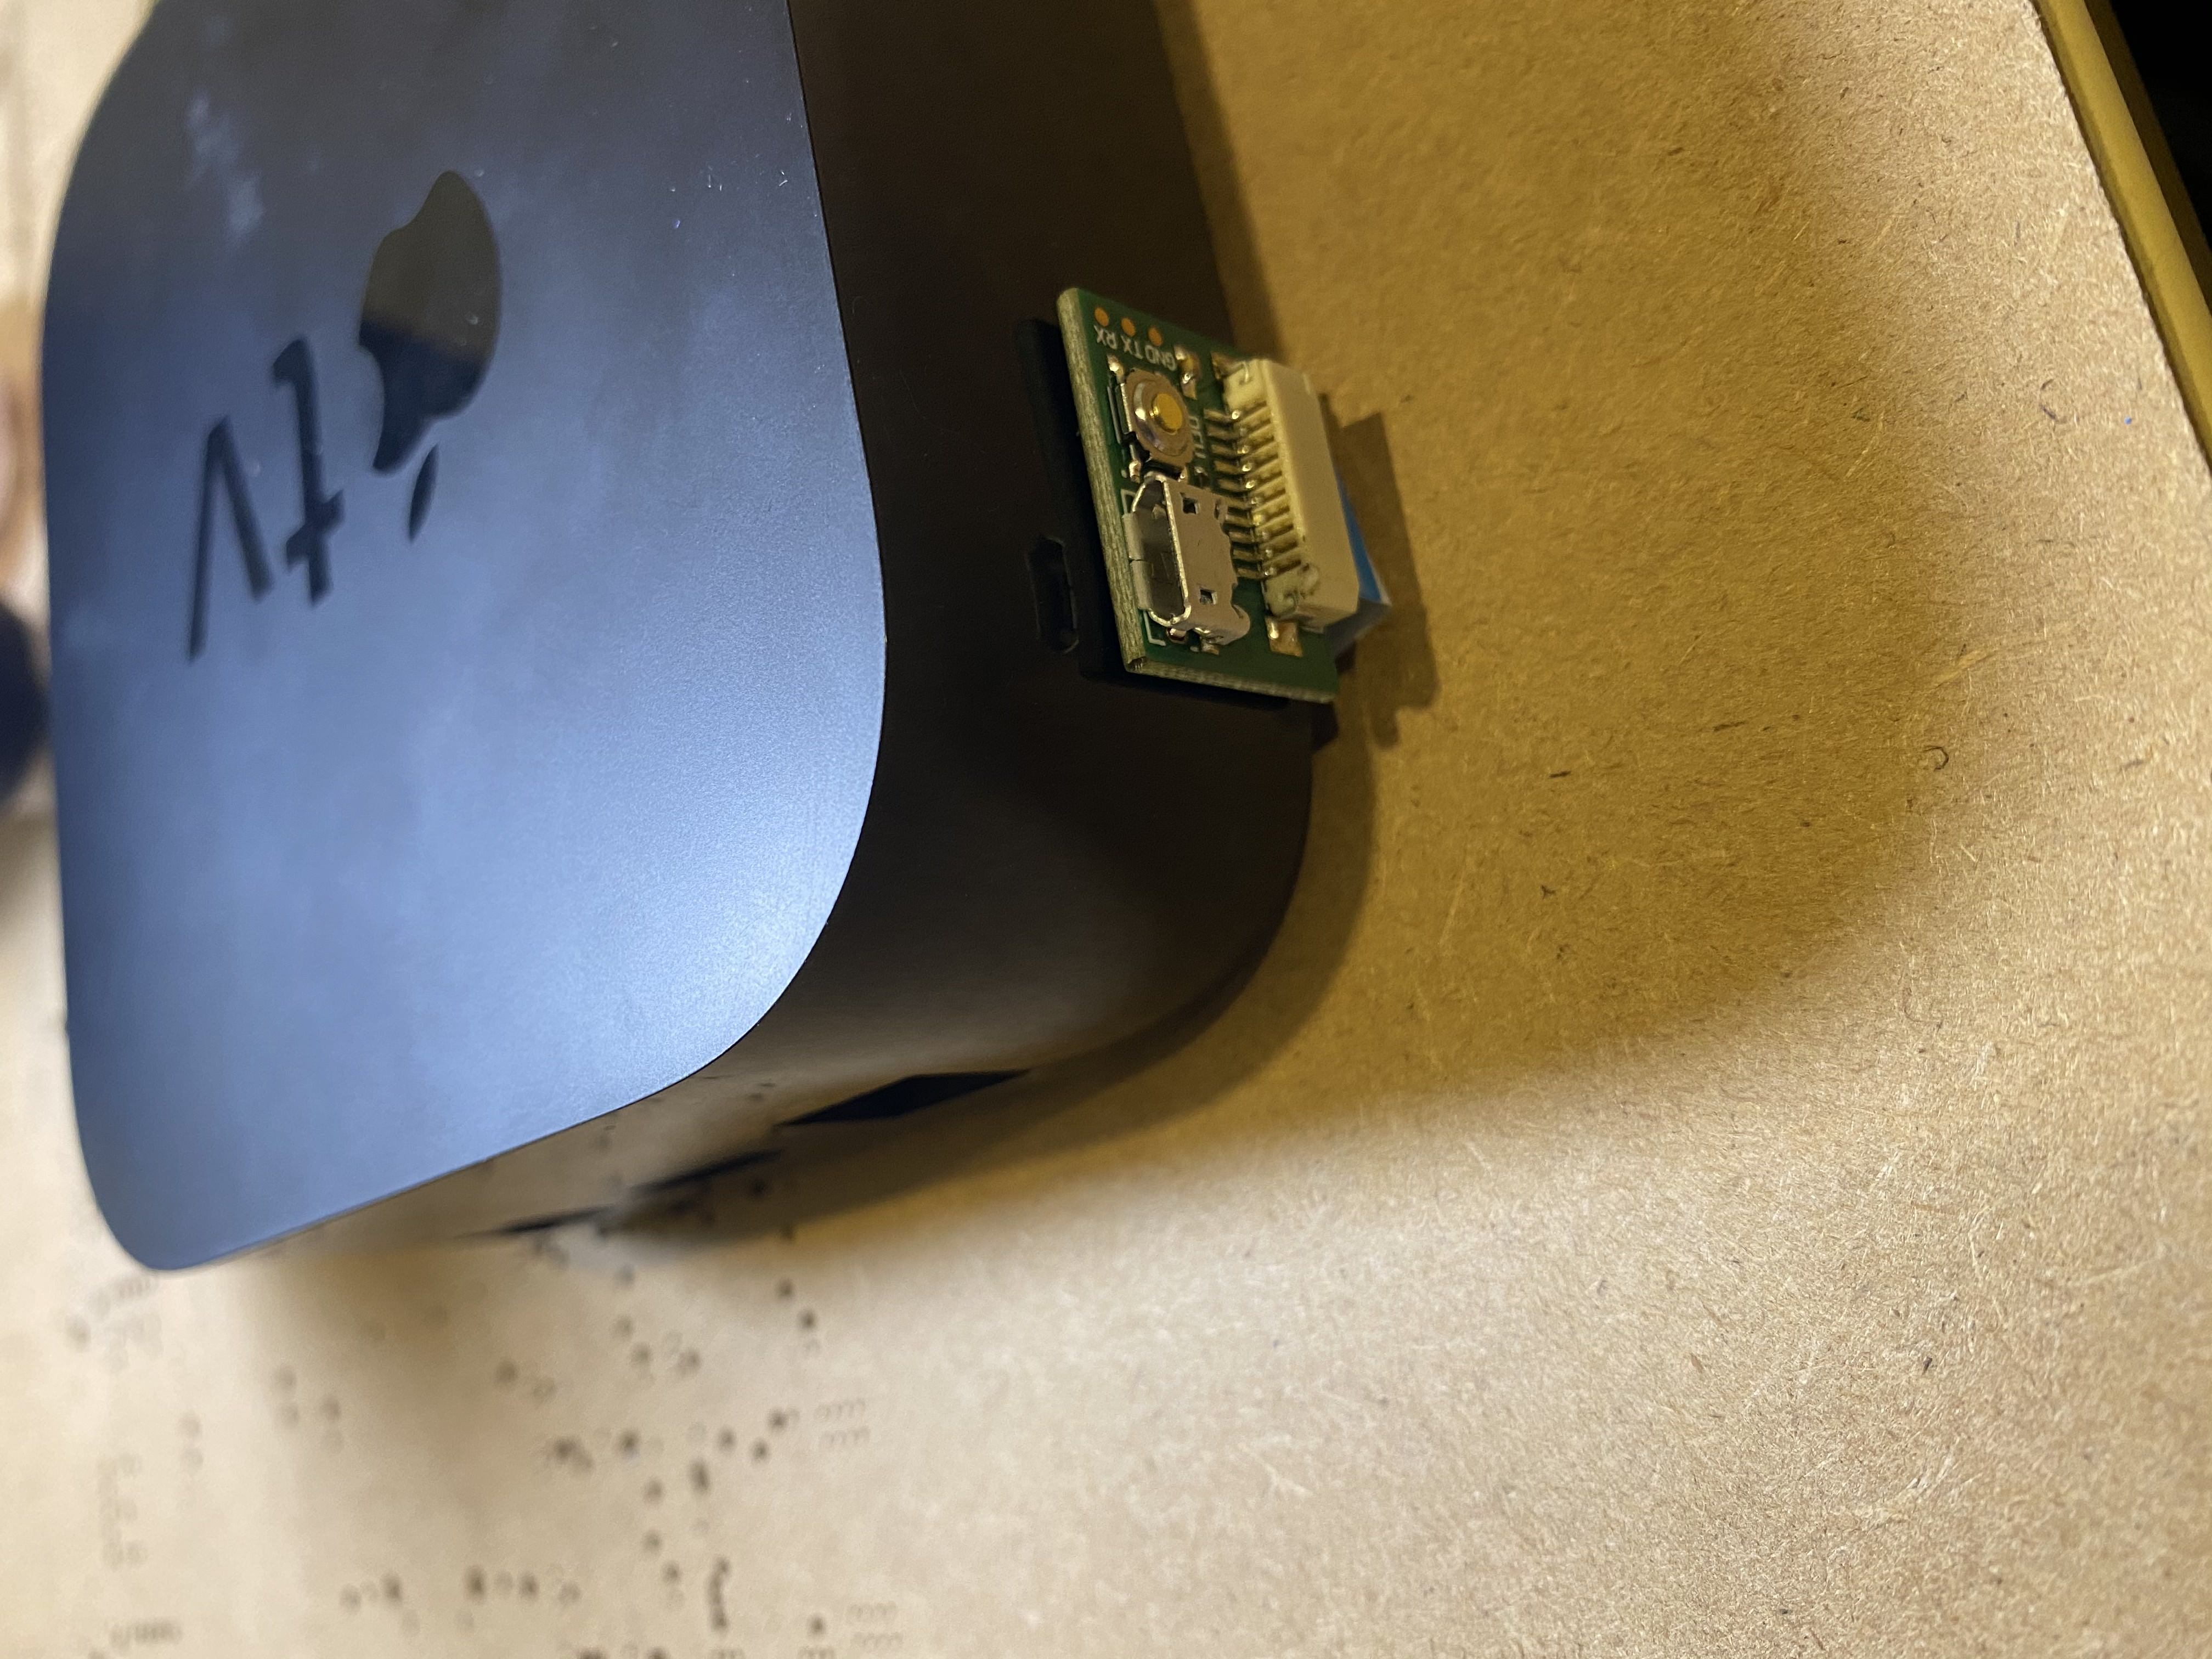
Feed the FFC through one of the fan vents for external access, and select a position where you intend on attaching the DFUSB board. Below is my chosen location but it is user choice.
Connect the FFC with the blue side facing up to the DFUSB board and installation is complete. You are now ready to jailbreak.
Connect a microUSB cable and hold the DFU button on the DFUSB board then plug in the AC power cable until the light on the front flashes rapidly indicating USB. You may also press the button once booted and hold until you see the DFU indicator, but it will take ~5 seconds longer. Once in DFU run checkra1n version 0.9.7 or later.
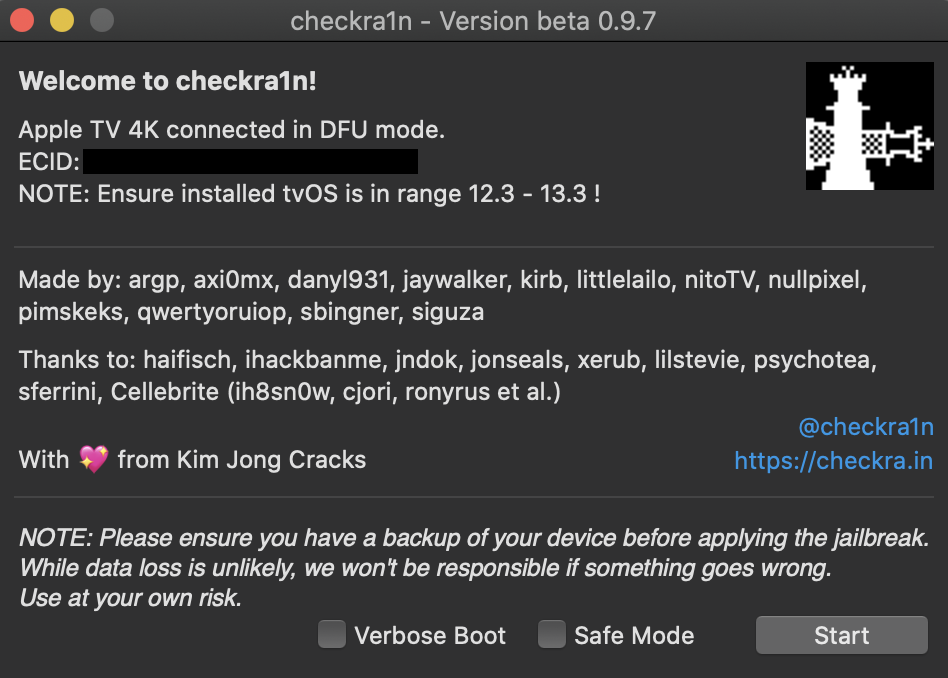
Once checkra1n says “booting” you may remove the USB cable as it has finished. Checkra1n will fail with a bootstrap error, but the jailbreak will still be successful.
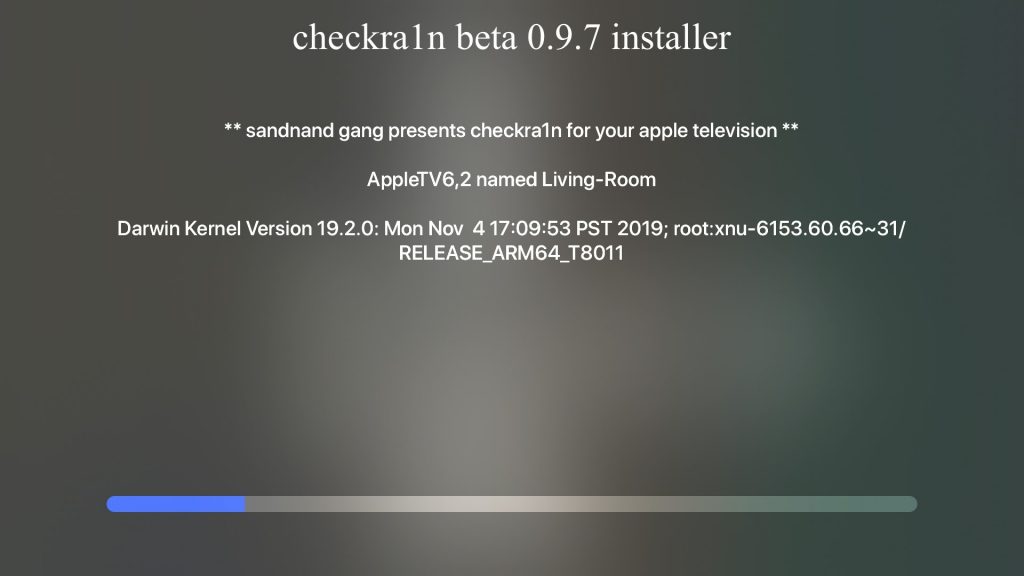
Once your Apple TV has booted it will download the installer from the internet. It can take several minutes after the internet is available to download, and will start the installer on initial jailbreak automatically.
Help Me I Messed up
Below are solutions to the 2 most common issues
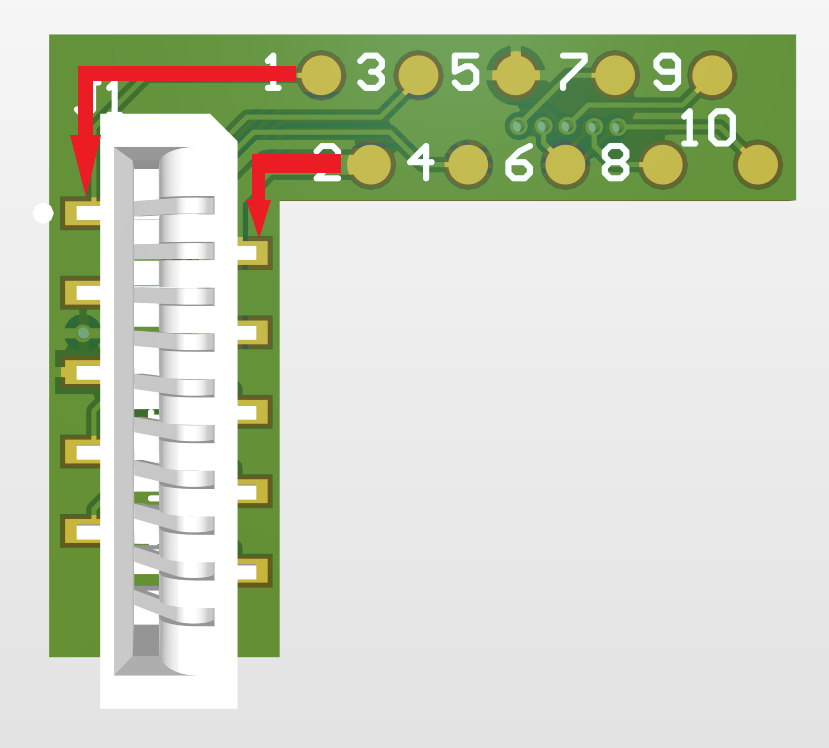
If you lift one of the gold pads on the breakout board, starting with 1 and 2 where the arrows indicate, working down the line the pins correspond to 1,3,5,7,9 on the left and 2,4,6,8,10
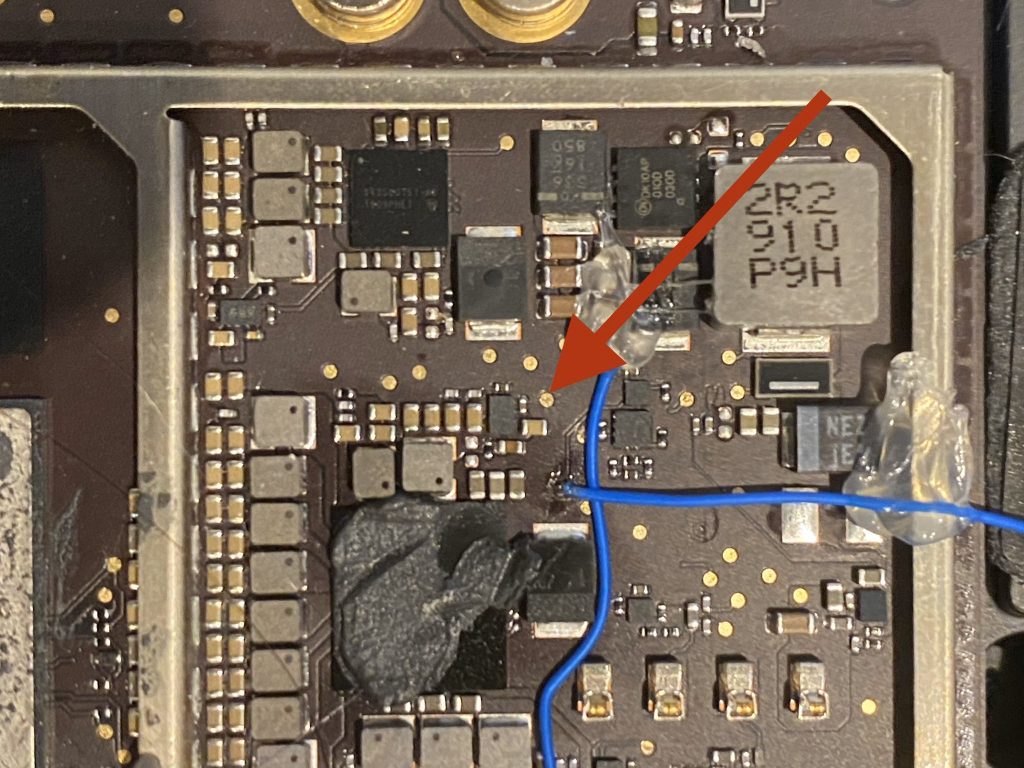
In cases where point 10 is no longer usable, the arrow points to an alternate point that can be used to enter DFU. It is recommended to use the standard point where possible, and only use this point if you don’t have any other option